Enable Offline POS
Offline POS
Introduction
The Offline POS is related to a Store - in the same way as a Store is
related to the Enterprise. This means that the replication dashboard if
accessed from the On-premises Store will list all the offline POS
terminals connected to the store.
An Offline POS will always have a Database of its own. This database
has to be downloaded from the Store and then restored on the Offline
POS.
Offline POS Installation
iVend Offline POS can be installed and configured on machines with
Windows 10 OS and above with MSSQL Express preinstalled on the
machine. The following are the steps to install Offline POS.
∙Right click on the iVend 6.6 installation executable file and run it as
Administrator.
∙iVend installation shield prepared to install
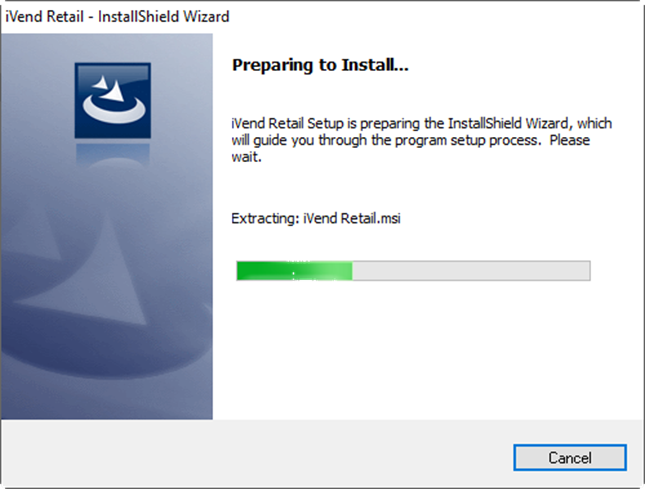
Figure 1 iVend Installation Wizard
∙On the welcome screen Click on Next button to continue
installation
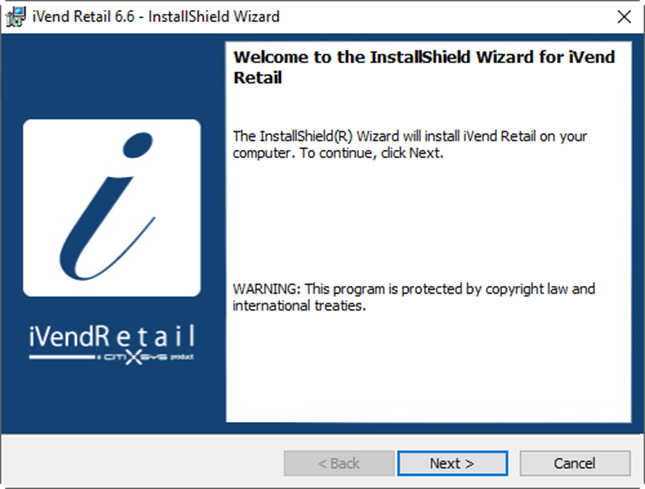
Figure 2 Installation Wizard Welcome Screen
∙On the License Agreement screen, Accept the License terms and
click Next button.
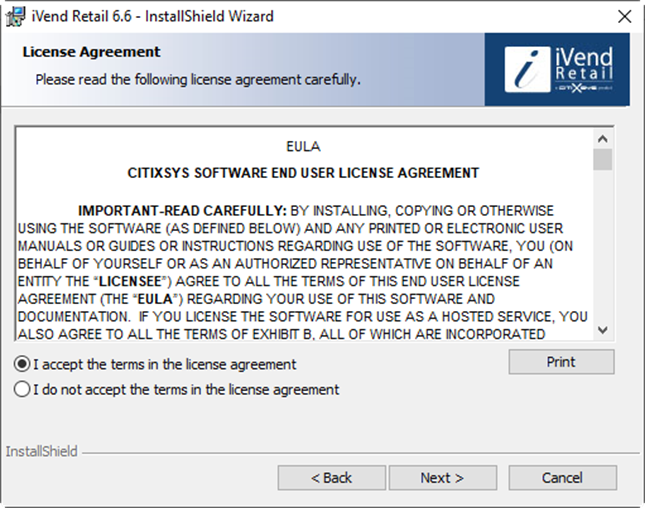
Figure 3 Installation Wizard License Agreement
∙On the Customer Information Screen enter username and
organization information and click on Next button.
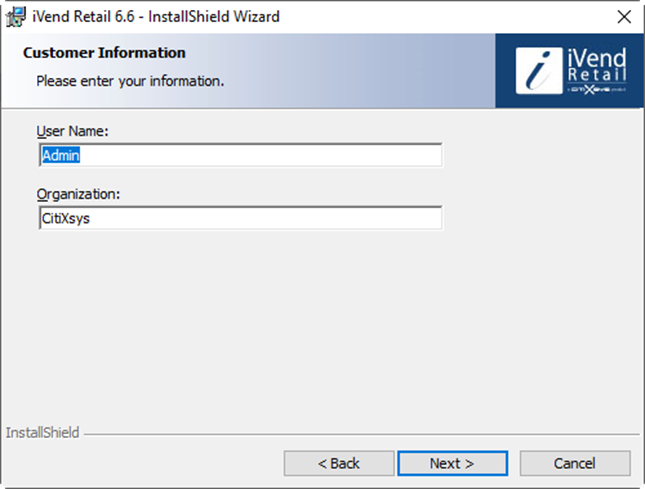
Figure 4 Installation Wizard Customer Information
∙On the Destination Folder screen, if you want to change the default
destination folder for installing iVend Retail click on change button
and select the destination folder. Click on Next button to Continue
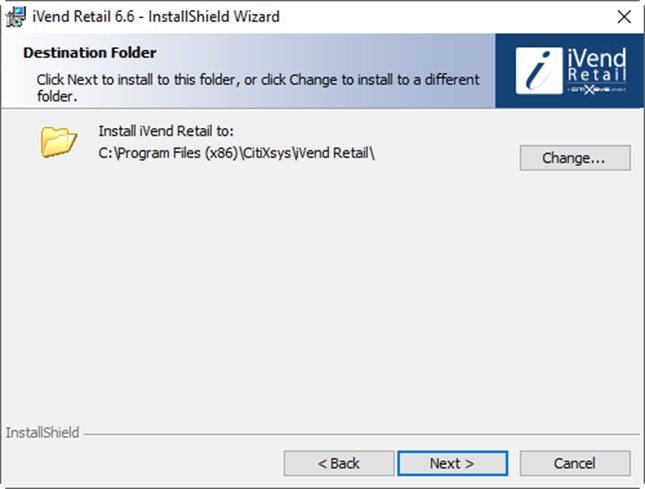
Figure 5 Installation Folder selection
∙On Installation Mode Selection screen, click on the “Choose an
Installation option”.
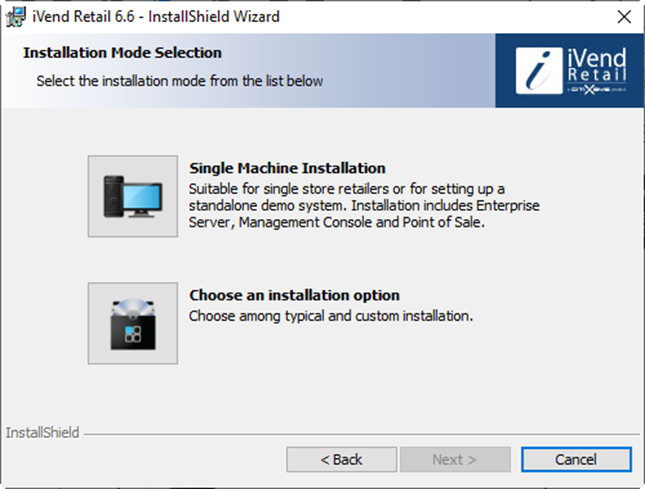
Figure 6 Installation Mode Selection
∙On Choose and installation option screen, click on Custom
Installation option.
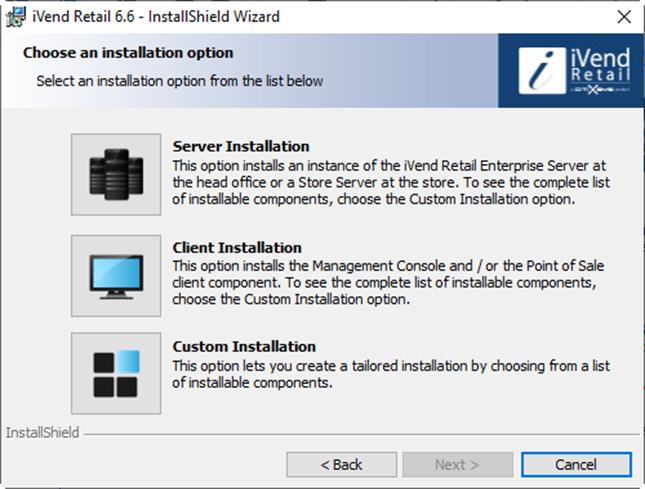
Figure 7 Installation Option Selection
∙On the Customer Installation screen, uncheck all the option except
Point of Sale and click on Next button.
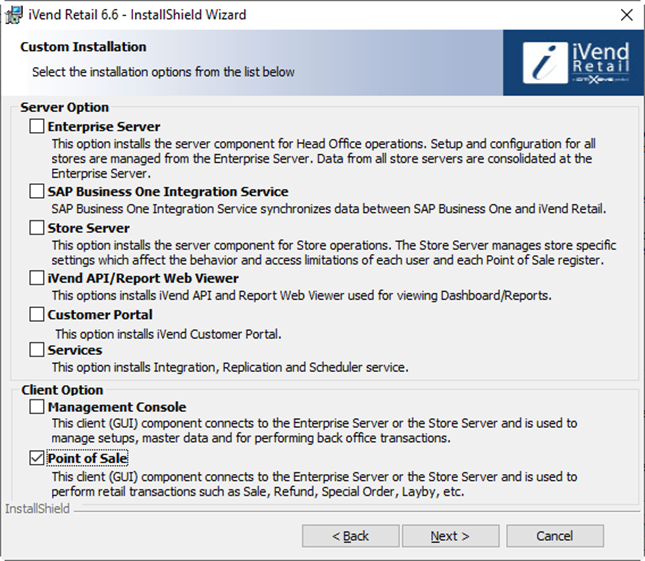
Figure 8 Custom Installation Option Selection screen
∙On Ready to Install the Program screen, click on the Install button.
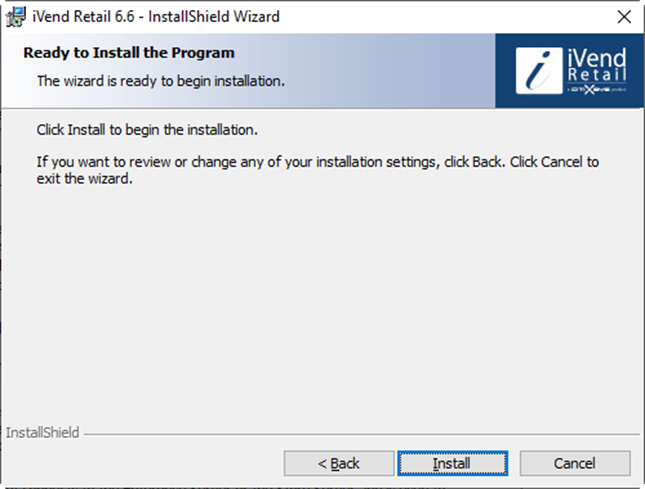
Figure 9 Click Next to Install
∙Please wait while the InstallShield Wizard installs iVend Retail.
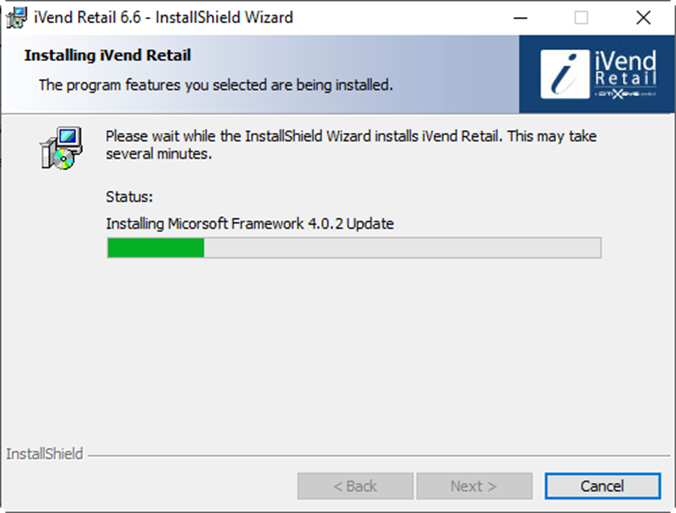
Figure 10 Installation Status
∙When InstallShield Wizard completes installation successfully
Login credentials for POS is displayed on the screen.
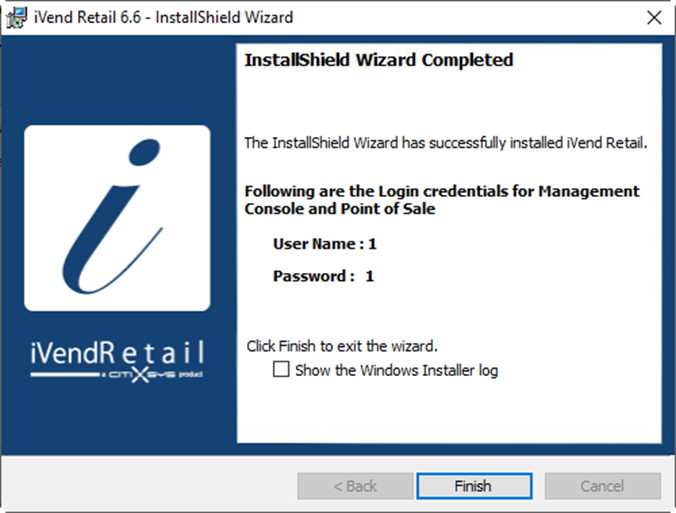
Figure 11 Installation Completion Screen
∙Click on Finish to exit the installation. The iVend POS icon

shortcut gets generated on the desktop.
Offline POS Database
An Offline POS will always have a Database of its own. This
Database has to be downloaded from the Store and then restored on
the POS.
The section below explains
∙How to take the backup of the Offline POS Database from the
Store?
∙How to download and restore the dB on the Offline POS and
switch on the replication service to access the replication
dashboard.
Take Backup of Offline POS from iVend Cloud
∙On the web browser enter the iVend Cloud URL provided in the
welcome email. The url will be https://<yourcompanyname>.ivendcloud.com
∙Log on screen gets displayed on the web browser. Enter the super
user Login credentials as provided in the welcome email.

Figure 12 iVend Cloud Login screen
∙Click on the iVend Management Suite screen.
∙Enter the Super user credential for Username and Password and
click on Login button.
∙iVend Management Console opens. Go to Administration> IT
Administration >Database Backup. Select the cutoff date and Store/Offline POS
and click on Connect button
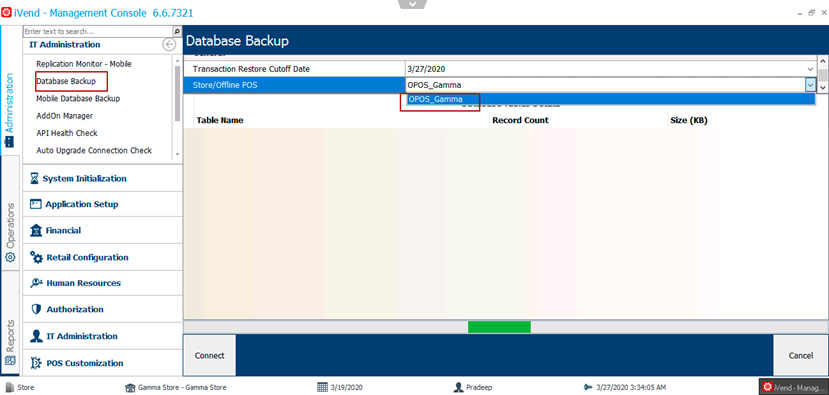
Figure 13 Database Backup
∙On the confirm screen click yes to continue the database backup
∙On the cloud machine select or create a folder, enter the name of
the database to save and click on the Save button to save the
database.
∙The database backup starts
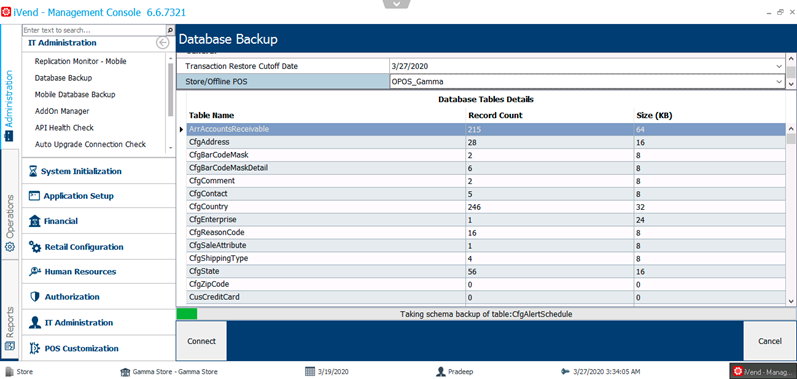
Figure 14 Database Backup Details
∙Once the database backup is complete the database files gets
saved in the folder.
Download the Database Backup File on local machine
∙On the Top middle of the webpage click on the down arrow button
∙Menu list opens on the top of the webpage. This menu has Print,
From PC to Server, Clipboard, From Server to PC, File Manager,
and Full Screen buttons.
∙Click on the “From PC to Server” button to download

Database from the iVend Cloud Enterprise machine.
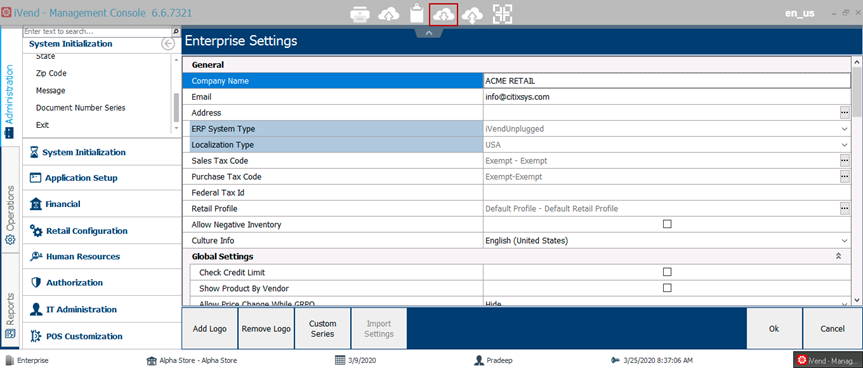
Figure 15 iVend Enterprise Settings
∙Select the database file from the location where the Enterprise
Database backup is to be saved on the iVend Cloud machine.
∙Select the Database and click on the Open button.
∙The Database download starts, choose a folder on the local
machine to download the database from the iVend cloud machine
and click on the Save button.
∙Once the database backup file gets downloaded, it will be
displayed in the destination folder on your local machine.
Restore Database on local machine
1.On the local machine search for iVend Configuration Manager in
the run on the Task manager. Right click on iVend Configuration
Manager and Run as administrator.
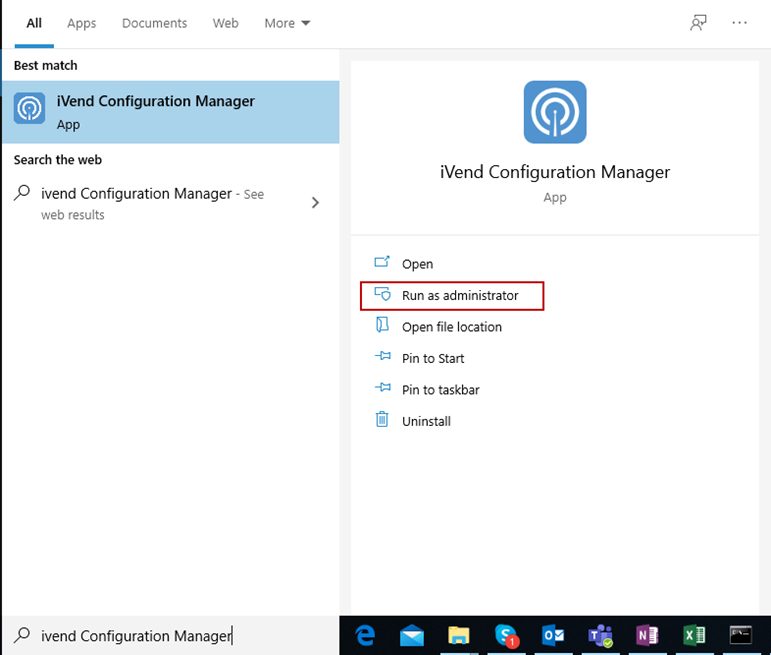
2.Figure 16 iVend Configuration Manager
3.A pop up message gets displayed on the screen.
4.iVend Configuration Manager icon gets added on the Taskbar tray .
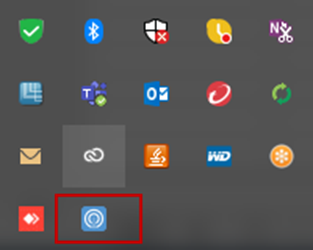
Figure 17 iVend Connection Manager icon
5.Right click on the iVend Configuration Manager icon and click on
Connection Manager option.

Figure 18 Connection Manager button
6.Connection Manager screen opens. Select the check-box for
offline POS and click on Update button.
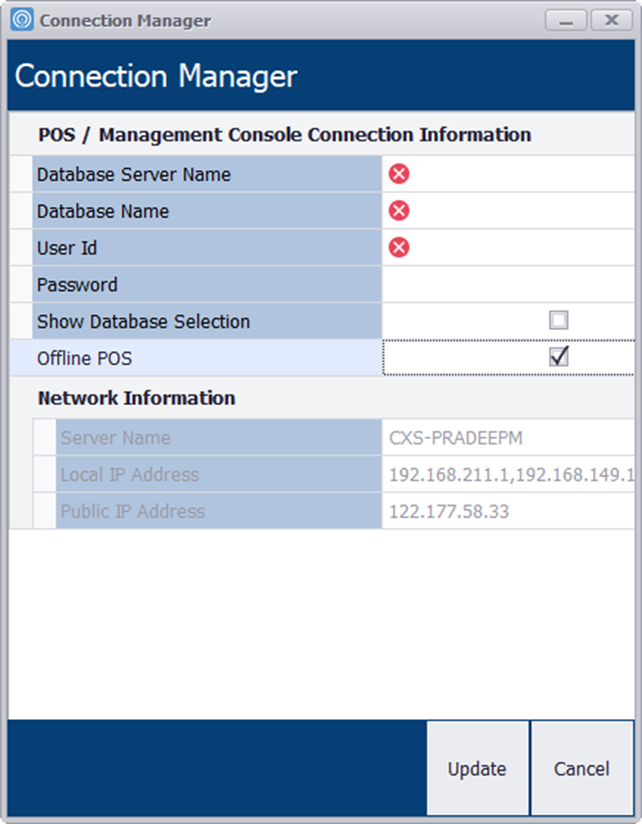
Figure 19 POS/ Management Console Connection information
7.Right click on the Point of Sale icon on the desktop . Screen to restore the backup database opens. Click on the Save button to save the settings and restore the database.
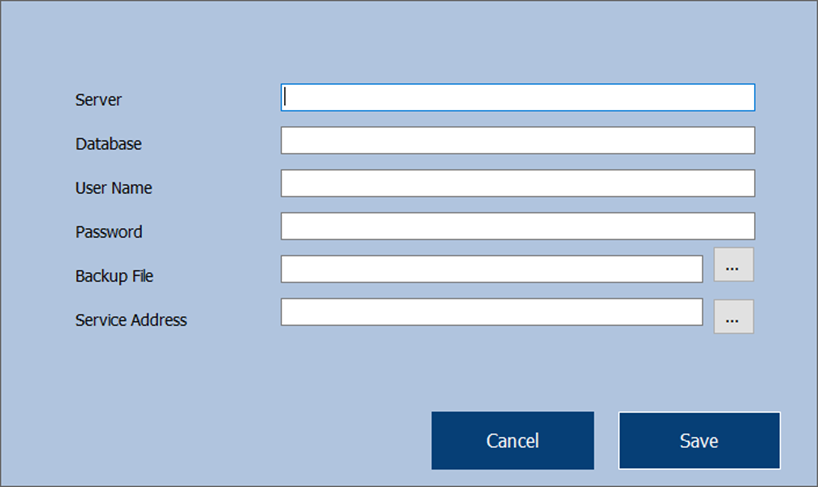
Figure 20 Database connection information form
8.Enter the following information
9.Once the database Restores the Replication service gets updated.
10.Once the setup process completes, the Application closes down.
Click Ok on the pop-up message.
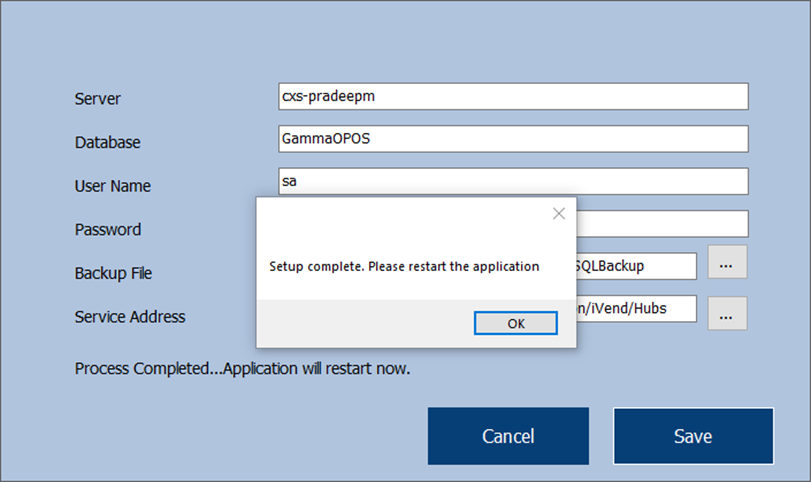
Figure 21 Database Connection Setup Complete
11.Click Ok to close the iVend Point of Sale configuration screen.
Open Offline POS
∙Right click on the Point of Sale icon and run as Administrator.
The Offline POS screen opens.
∙On the Point of Sale (OFFLINE)screen login with the credentials
given by Super user of https://<yourcompany>.ivendcloud.com.
∙Click on Yes on the Business Date pop up message to proceed.
∙The POS screen opens; you can start performing Transactions
using the Offline POS.
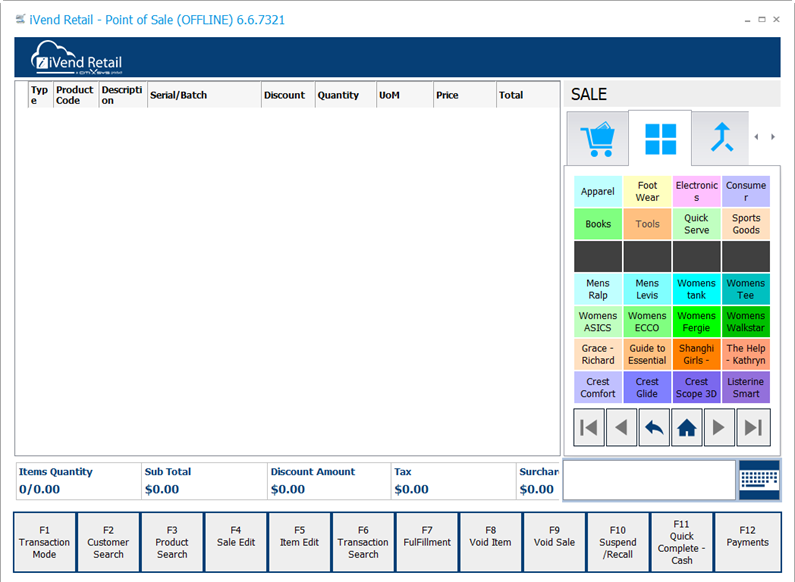
Figure 22 iVend Point Of Sale
Offline Sync Monitor
An Offline POS also has its own replication screen. follow the
following steps to open Offline Sync Monitor:
∙Click on the iVend Retail icon on the Offline Point
of Sale Screen,
∙On the User menu screen select the Offline Sync Monitor, and
click the Ok button.
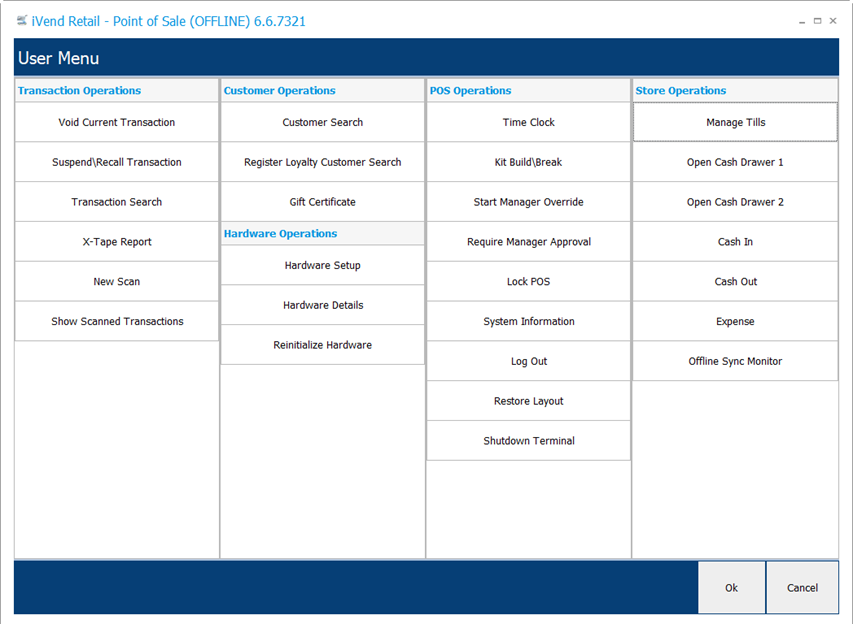
Figure 23 iVend Point of Sale Offline User Menu
∙Offline Sync Monitor Opens and displays all the transactions that
have not been synchronized since the last time the POS was
online.
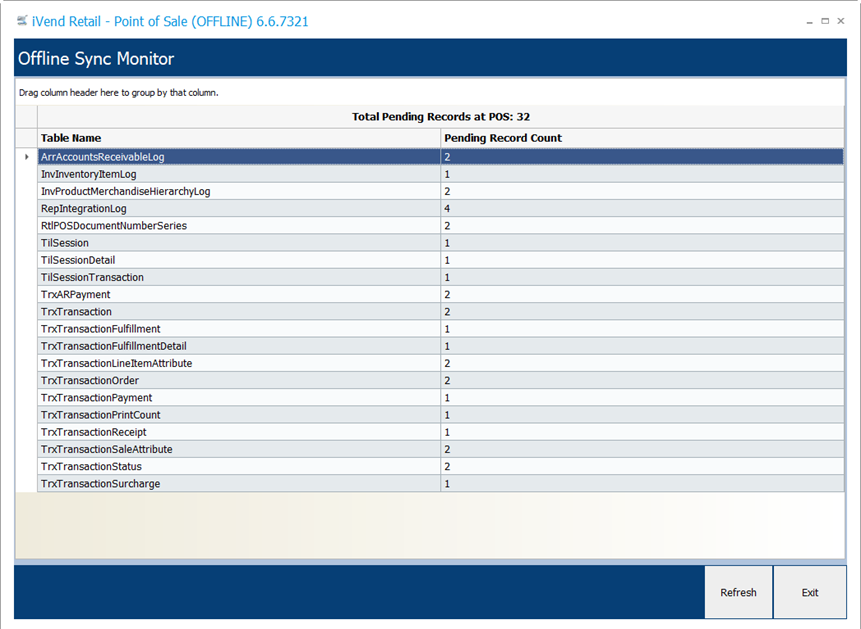
Figure 24 Offline Sync Monitor
∙Once the Offline POS comes online and gets connected to the
store, the records gets synchronized and there remains no pending
records for synchronization.
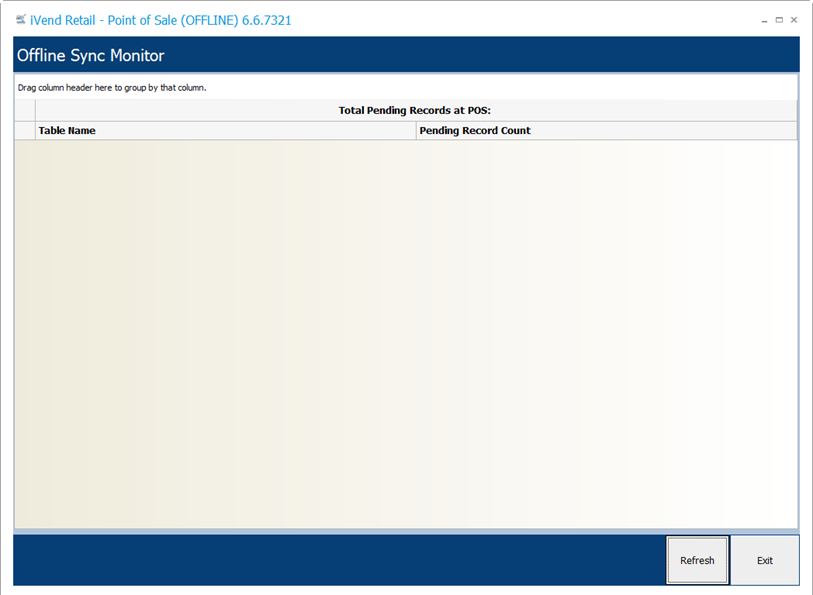
Figure 25 Offline Sync Monitor Status
Related Articles
Offline Terminal POS Data Sync with Store
iVend Retail - Offline Terminal POS Data Synchronisation with the Store server This document describes the Offline Terminal POS feature and the data synchronisation with the Store Server. · This feature allows the Terminal POS to function even if the ...Offline POS is not Listing in Replication dashboard monitor
Environment : iVend Version 6.6 7702 Problem Statement : Offline POS is not Listing in Replication dashboard monitor Symptoms : Configuration Issue Resolution/Work Around : Store and Offline POS, iVend version should be same. Install the iVend ...Offline POS
Introduction The offline POS feature allows the terminal POS to function even if the connectivity between the terminal POS and the store server is interrupted. The Offline POS feature has to be enabled via the iVend Retail Management Console. Note: ...Feature comparison MobileAndTerminal POS
Overview The following table documents the feature comparisons between Mobile POS (Online/Offline) and Terminal POS (Online/Offline): S.No. Heading Functionality mPOS-Online mPOS-Offline TPOS-Online/Offline 1 General Transaction Mode Y Y Y 2 General ...iVend Offline POS - Purge Data for Offline POS Database
Product Query Is there any process to purge Offline POS Database? From HO Server only is possible to purge the store database but not offline pos. Environment iVend 6.6 Solution As per current iVend functionality Data purging (from iVend Management ...