Security Role and Security User
Security Role and Security User
Security Roles
iVend Retail 6.5 allows the user to set up Security Roles and assign various Security Rights to these roles.
You can setup roles like – Manager’s Role, Cashier’s Role, Sales Person’s Role and so on. Based upon the pre-defined roles, one can decide what access rights should be assigned to a role, depending upon his/her position in the managerial hierarchy.
Business Case
A Retailer can determine who is being assigned to and what is being assigned to, in the iVend Retail application. It gives the Retailers a granular control over the application thereby ensuring effective management and robust security at the same time. For example, assigning rights to users based upon their position within the organization, the POS rights be given only to POS users, Business Transaction rights be given only to the Inventory Staff users.
Benefits of Security Roles
· Security roles helps the retailer to provide the appropriate authorization based upon the user’s roles and responsibilities.
· iVend Retail 6.5 enables the retailers to map the Display Profiles to the security roles. Display Profiles helps to set and save different screen customizations, per group of users, based on the type of role they have in the organization on the iVend screens. For example, a Store Manager role can be configured in such a way that he can see much more detail on the Customer and the Product master screens as compared to what a standard Cashier can see on his screen.
· iVend Retail 6.5 enables the retailers to assign the Security roles at the store level. With iVend version 6.5 and above, the Store Manager can also assign roles to newly created POS users.
Setup and configuration
iVend 6.5 comes with the standard security role of “Administrator Role” as part of the initial installation. This role consist consists of all the access rights that can be given to the user.
Note: The Retail can define an unlimited number of the roles based upon the business requirements.
Log into the iVend Management Console and navigate to: Administration > Authorization > Security Role – the Security Role Search screen pops up.

Figure 1 – Security Role Search
You may click on the [F3 New] button to define a new Security Role or click the [F4 Edit] button to edit an existing Security Role or click on the [F7 View] button to view an existing Security Role.
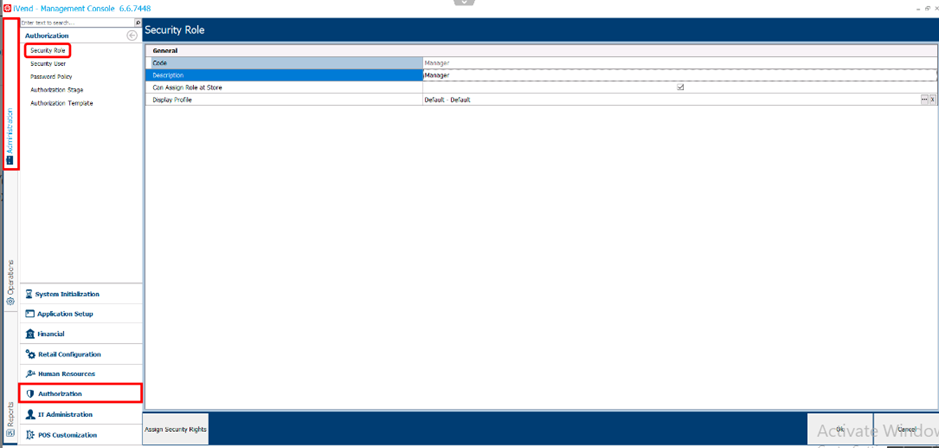
Figure 2 – Security Role Screen
To assign the Security Rights, click on the [Assign Security Rights] button located in the Security Role setup screen.
The table below, provides a detailed explanation of the fields utilized in the creation of a new Security Role: -


Note: The Display Profile can be configured via the Management Console. - Administration > Retail Configuration > Display Profile.

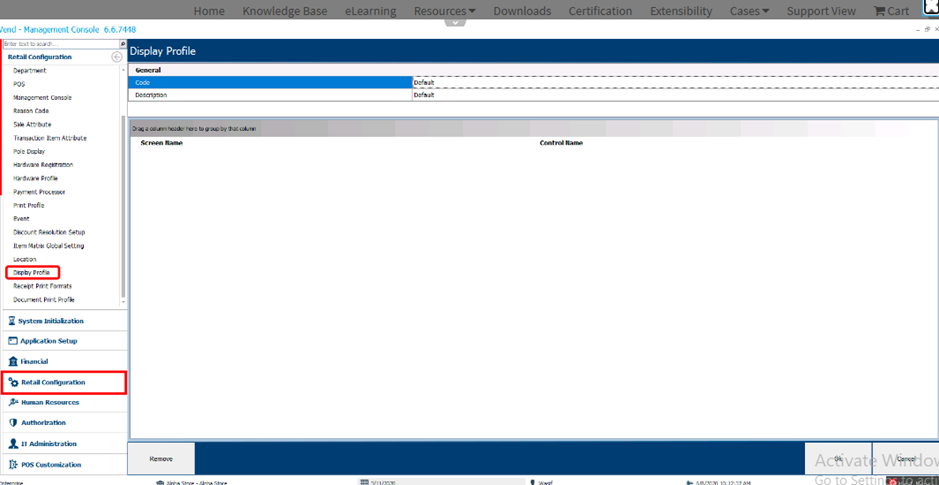
Figure 3 – Display Profile Screen
Security Rights
The screen image below lists all of the options available in the system for the Security Rights settings and allows the user to setup the access level for each of these options.
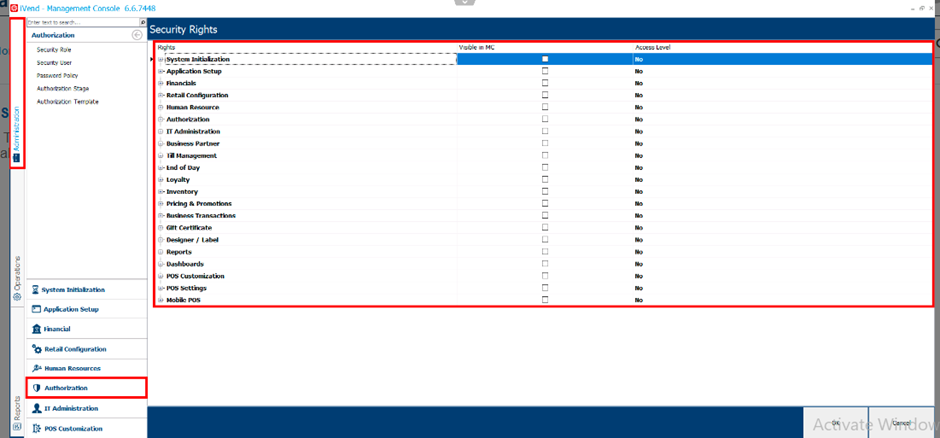
Figure 4 – Security Rights Screen

Figure 5 – Security Rights Screen
Security User
iVend Retail 6.5 and above enables the Administrator and/or User to search for existing Security Users in order to make modifications and to set up new users. All iVend users have to be set up as a Security User, to provide him/her with the rights to access various features in the Management Console and/or POS.
To create a new user, the Administrator logs into the Management Console using their administrator/user’s own code and password as it was setup in this screen.
With the standard installation of the iVend Retail application, User “1” can be used to log in to the Management Console to define the new Security Users. User “1” is reserved as the Super Administration User with Full access rights over all options and functions, which cannot be changed.
Business Case
A Retailer who is using the iVend application wants to provide the separate login to each iVend user so that users can use iVend retail as per his or her their roles and responsibility. Retailers who has the user assigned to stores can be mapped in the security roles.
Benefits of Creating a Security User
· Retailers can define separate Security Users for the Enterprise Management Console and the Store Management Consoles.
· Separate Users can be defined for login to the POS and the Management Console in the setup.
· Audit Logs can be maintained within in the iVend application, in case different users are created to post the data in the Management Console and/or the POS.
Pre-requisites for Creating a New Security User in the Management Console
a. The user must first be defined as an employee in the Management Console under: Human Resources > Employee.
b. The Security Roles must be defined and /updated to accommodate the new user.
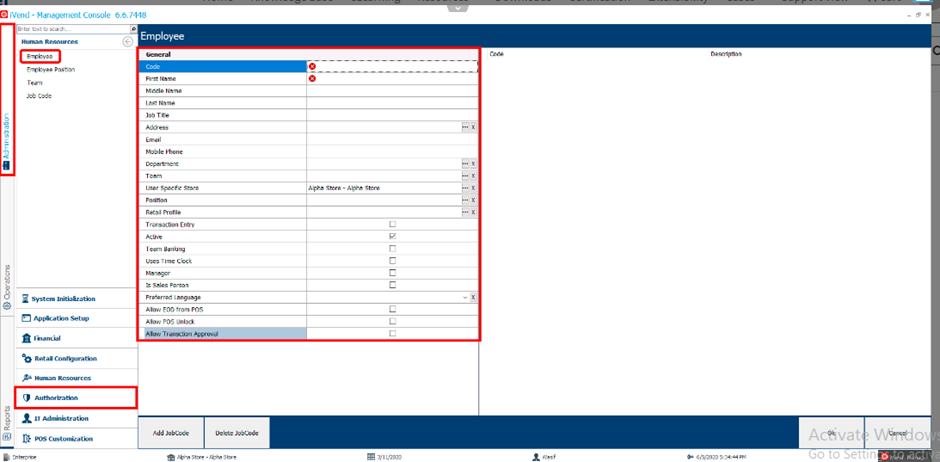
Figure 6 – Employee Setup Screen
Setup and Configuration
The Security User option is located in the Management Console. Log into the iVend Management Console and navigate to: Administration > Authorization > Security User – the Security User Search screen pops up.
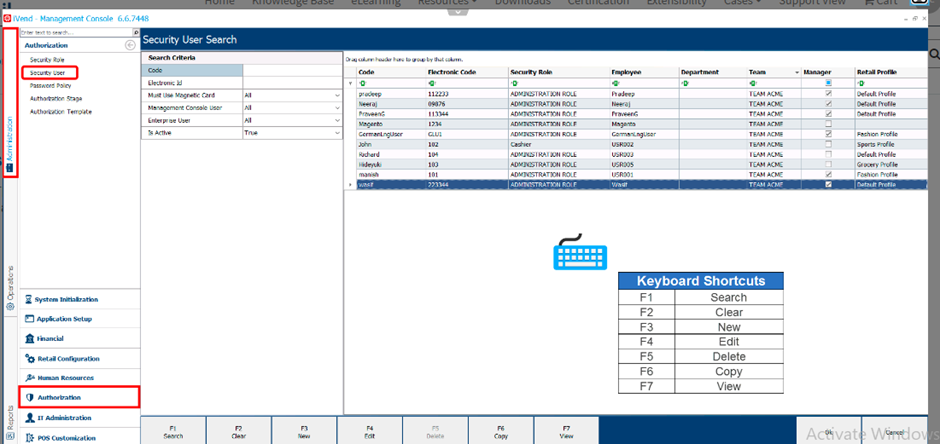
Figure 7 – Security User Search Screen
You may click on the [F3 New] button to create a new Security User or click the [F4 Edit] button to edit an existing Security User or click on the [F7 View] button to view an existing Security User.
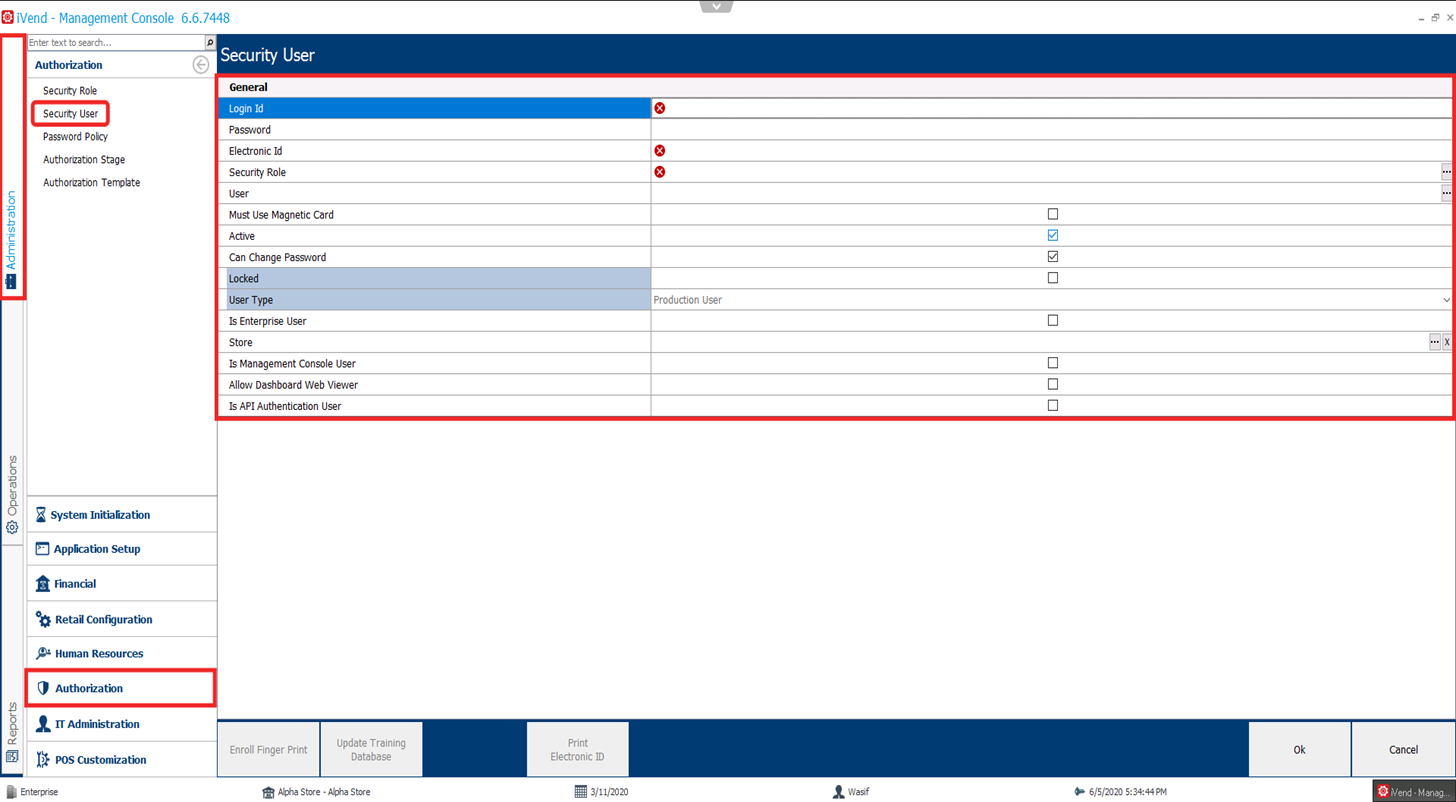
Figure 8 – Security User Screen
Note: The fields Login ID, Electronic ID and Security Role are mandatory fields.

The table below provides a detailed explanation of are the screen setup the field details in the Security User setup screen: -


Note: On upgrading iVend, the training database does not automatically get upgraded and therefore the manager must log into the iVend Management Console and update the training databases after an upgrade.
This concludes the document on - Security Role and Security User.
Related Articles
Export and Import Security Rights
Export and Import Security Rights Security Role is added to the object type of Import data and Export Data. This means that Security rights can be exported from one system and can be imported into another system. Benefit Security roles can be easily ...User based discount for Product Master
1: Open Product Master and configure "Max Discount Percentage [Manual]" 2: Created two Security Rolls, as mention highlighted below. Security Rolls User A: Attached Security Role Admin2 This User has full rights in security Rolls. User B: Attached ...Getting error user doesn't have login rights (Cloud user)
Problem Statement Getting error user doesn't have login rights (Cloud user). Issue details It’s a cloud deployment. Customer setup the store manager to access a specific store, but they are getting the error "user doesn't have login rights" while ...Item Label not able to print and save from Store Admin Role
Problem statement Item Label not able to print and save from Store Admin Role. Environment Ivend 6.6 Symptoms Item Label not able to print and save from Store Admin Role even after access right was set “Label Printing = Yes” under Designer/Label in ...Disable "Register Loyalty Customer search" from user menu
Environment: iVend 6.6 SAP IS Retail Problem Statement: How to disable "Register Loyalty Customer search" from user menu in POS Application. Proposed Solution: Below steps are followed, to impose restrictions on a user when they attempt to access the ...