Retail Profile
Retail Profile
The Retail Profile allows for the setting up of the system specifically for POS related information, which can then be applied to the POS at the store.
It is important to note that a Retail Profile can be specified at the User, POS, Store and Enterprise levels. There is no limitation on the number of Retail Profiles that can be defined in the system and it is possible to assign different Retail Profiles per Store, POS and User.
 Note: If the Retail Profile is not specified at the User level, then the Profile specified at the POS level is used. If the Retail Profile is not specified at the POS level, then the Profile specified at the store level to which the POS is mapped is used instead. Then, if it is not specified at the store level, then the Retail Profile specified at the Enterprise level is used for all Stores, POS and Users.
Log into the iVend Management Console and navigate to: Administration > Retail Configuration > Retail Profile – the Retail Profile Search screen pops up.
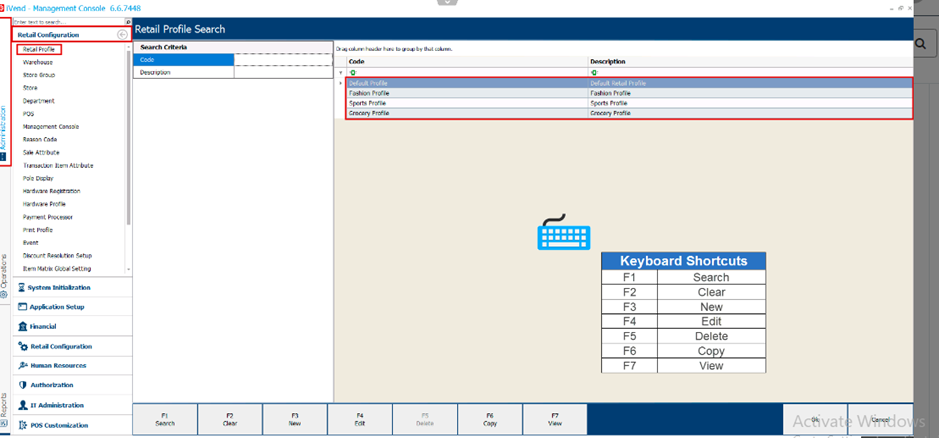
Figure 1 – Retail Profile Search Screen
Select a Retail Profile and click [F7 – View] to bring up the Retail Profile settings screen.

Figure 2 – Retail Profile Settings Screen
Search Screen
Field Description/Activity | |
Search Criteria | |
Code | Specify the code for the Retail Profile that you wish to search on or leave blank to search on all codes. |
Description | Enter the description for the Retail Profile that you wish to search on or leave blank to search on all descriptions. |
Search Results | |
Code | Displays the code of the Retail Profile(s) searched. |
Description | Displays the description of the Retail Profile(s) searched. |
Subsidiary | Displays the Subsidiary of the Retail Profile searched (This option is only valid if the Subsidiary functionality has been enabled in the system) |
Note: There is only one mandatory field in setting up a Retail Profile and that is the Code field.Field Description/Activity | |
General | |
Code (Mandatory) | Enter a code for the Retail Profile. This is mandatory - a unique code with a maximum of 20 alphanumeric characters can be entered. |
Description | Enter a description for the Retail Profile. A description with a maximum of 100 alphanumeric characters can be entered. |
Subsidiary (Mandatory if enabled) | Select a Subsidiary to which the Retail Profile belongs from the list of Subsidiaries. Click the radio button [...] to open the Subsidiary Search screen and select the Subsidiary. This field will only be available and also becomes mandatory if the Subsidiary functionality is enabled. Once the Retail Profile is saved then the Subsidiary value assigned cannot be changed. |
Department | Select a Department from the list of available Departments. Click the radio button [...] to open the Department Search screen and select a Department. To add a new Department, press F3 or click on the [F3 New] button in the Department Search screen. This is an optional feature and provides additional reporting analysis if it is deemed necessary. |
Default Transaction Mode | Select one of the transaction modes as a default mode for the Retail Profile. For example, if the default mode selected is Sale, then the POS to which the Retail Profile is assigned will open in the Sale mode for every new transaction. This feature is useful if separate POS terminals are used for specific functions, such as a separate Refund or Special Orders counter. The various modes that can be set as the default Transaction Mode are: · Sale (This is the most common mode and is the default set by the system) · Sale Exchange · Sale Refund · Special Order · Layaway (Layby) · Quotation |
Auto Lock POS Timeout (in seconds) | Enter a time duration in seconds. This defines the duration after which the POS becomes locked. The user will have to log back in to continue further tasks at the POS. The default value of zero means that there is no Auto Lock Timeout duration and the function will not occur. |
Idle Timeout (in seconds) | Enter a time duration in seconds. This defines the duration after which the POS flash screen will be displayed at POS terminal if there is no work being carried out. The default value of zero means that there is no Idle Timeout duration and the function will not occur. |
Auto Close Complete Sale View (in seconds) | Enter a time duration in seconds. This defines the duration after which the “Complete Sale” screen at the POS will be closed, returning to the main sale transaction screen. The default value of zero means that there is no Auto Close Complete Sale View time duration and the function will not occur. |
Login Per Transaction | Select this option if you wish that the user has to log in at the POS before every new transaction. The system will automatically log out to the flash screen after each transaction has been completed at the POS. |
Use Zip Validation | Select this option if you wish that the Zip Code in the address for the customer needs to be validated. To use this feature, it is important that the Zip Codes are first defined in the Administration, System Initialization, Zip Code settings. |
Show Transaction Grid Headers | Select this option if you wish that the Transaction Screen Headers are to be displayed to the user at the POS. This is turned on by default and would be the most common setting. |
Price Override Lower Limit | Enter a percentage value. This field defines the limit to which the user at the POS can decrease the price of a product. The default system value of 99,999,999,999.00 % means that there is no limitation defined. |
Price Override Upper Limit | Enter a percentage value. This field defines the limit by which the user at the POS can increase the price of a product. The default system value of 99,999,999,999.00 % means that there is no limitation defined |
Keyboard Mode | Select one of the following keyboard modes: · US Block Keyboard – Displays the keyboard in the sequence of the standard English alphabet, i.e. A, B, C, D, E, F, G, etc. · US Qwerty Keyboard – Displays the keyboard as per the sequence in a QWERTY keyboard, i.e. Q, W, E, R, T, Y, U, I, O, P, etc. · US AZERTY Keyboard is a specific layout for the characters of the Latin alphabet on typewriter keys and computer keyboards, i.e. A, Z, E, R, T, Y, U, I, O, P, etc. The onscreen keyboard displayed at the POS will be as per the mode selected here. The system default and most commonly used keyboard is defined as the US Qwerty Keyboard. |
Display Keyboard for Authorization | Select this checkbox to display a virtual onscreen keyboard when logging-in for multi-level authorization and approval processes. Consideration for turning this feature on would only be given if the Advanced Authorizations feature was being used. |
Transaction Mode Alignment | Select where the Select Mode popup screen displays on the POS transaction screen when the [F1 Transaction Mode] button is pressed on the main Sale transaction screen. The default setting in the system is to set to display on the right side of the screen. |
Open Item Edit View Automatically | Select this option if you wish for the ‘Item Edit View’ screen to open when a product is scanned at the POS by a user. The system default and mostly commonly defined setting for this function is that it is turned off. |
New Row For Scan | Select this option if you wish that a new line is to be created for every product scan by the user during the transaction at the POS. For example, if the option is not checked and the same product is scanned multiple times, then the quantity count in the Quantity field of the product is increased by increments of one (1) instead of showing the subsequent scans as separate lines on the transaction screen. |
Open Item Edit View on Column Click | Select this option if you wish for the “Item Edit View” screen to open when the user clicks on either the Price or Quantity fields of a product on the transaction screen. The system default and mostly commonly defined setting for this function is that it is turned on. |
Refund Without Receipt
| Select this option if you wish to enable that a user can perform a Sale Refund at the POS without a receipt. If this option is not checked the Sale Refund transaction mode at the POS will be disabled. The user would first need to search for the original transaction using the [F6 Transaction Search] button before a refund could be performed with the [Sale Refund] button found on that Transaction Details screen. The system default and mostly commonly defined setting for this function is that it is turned on. |
Exchange Without Receipt
| Select this option if you wish to enable that a user can perform a Sale Exchange at the POS without a receipt. If this option is not checked the Sale Exchange transaction mode at the POS will be disabled. The user would first need to search for the original transaction using the [F6 Transaction Search] button before an exchange could be performed with the [Sale Exchange] button found on that Transaction Details screen. The system default and mostly commonly defined setting for this function is that it is turned on. |
Auto Update Change Amount in Payments
| Select this option if you wish that the amount in change due to the customer at the POS is to be shown to the user on the payment screen automatically. For example, A product sold at the POS is sold for $40.00. The customer tenders $50.00 and the amount of change due to be paid back to the customer is $10.00. A separate line with the payment type “Cash” will be automatically added with the change amount showing as $10.00. If the customer is paying by cash, the change due is displayed in the “Change Amount” column of the payment details screen. If this option is not selected, for non-cash payments, the POS user would need to manually add a line for the payment of change to the customer. For cash payments, the exact amount due from the customer would need to be entered in the payment screen in order to proceed with the completion of the payment. The system default and mostly commonly defined setting for this function is that it is turned on. |
Change Amount Currency | Specify the currency that will be used for which the amount in change due will be returned to the customer. If the base currency is selected then the amount due in change will be displayed in the base currency, otherwise a foreign currency will be used for displaying the amount due in change at the POS. The mostly commonly defined setting for this feature is that the base currency is used. |
Donation Product Setup | Select a product which is to be used as the donation product. This is usually setup to use a non-inventory product which when defined here, will enable the transaction totals to be rounded up to the next whole dollar amount. The user at the POS will be prompted onscreen with a message to confirm whether the customer would like to round their payment for the sale up to the nearest whole dollar as a donation. |
Refund for Promotional Items | Select this option if you wish that the system to be setup to allow sale refunds on promotional items sold at the POS. The system default is set that this is turned off however consideration needs to be given to regional legal and fiscal requirements that stipulate whether a customer is entitled to a refund on products regardless of whether they are promotional items or not. |
Print Suspended Transaction | Select this option if you wish that the user can print suspended transactions at the POS. The system default is that this feature is turned off. Consideration should be given to loss prevention when enabling this feature. |
Delete Suspended Transaction at Day End | If this option is selected, then during the End of Day process, all suspended transactions will be deleted and cleared down by the system automatically. The system default is that this feature is turned off. Consideration should be given to loss prevention when enabling this feature. It is usually advisable that the store manager review all suspended transactions during the End of Day processes before they are cleared down. Suspended transactions are recorded in the Loss Prevention report and dashboard. This setting is effective based on the Retail Profile attached to the store. Only suspended transactions that do not have any authorized payments attached will be deleted. |
Auto Add Cashier as Sales Person | When enabled, this field would capture whether the cashier is added to all the transaction line items as a sales person automatically. The system default is that this feature is turned off. |
Warn if Transaction line item has no Sales person | When this flag is turned on, then the system will show a warning message at the POS if any of the transaction line items does not have a sales person assigned to it. The system default is that this feature is turned off. Consideration should be given to the setting in the field, Auto Add Cashier as Sales Person when using this feature. |
Mandatory Sales Person Per Transaction Line Item | When this flag is turned on, then the system would not allow the cashier to complete the sale if any of the transaction line items did not have a sales person assigned to it. The system default is that this feature is turned off. Consideration should be given to the setting in the fields, Auto Add Cashier as Sales Person and Warn if Transaction line item has no Sales person when using this feature. |
Show Negative Inventory Resolution | When this flag is turned on, then the system will show the cashier the negative inventory resolution screen whenever a product is added in a transaction at POS where the inventory is not available in the store. If this flag is turned off, then it is assumed by the system that the user would always like to continue selling the product despite the system recording that no inventory is available. It is important to note that if the cashier is allowed to continue to sell the item then the system will record negative inventory for that product being sold. The system default is that this feature is turned on. Consideration should be given to the settings for the store warehouse and at the Enterprise for allowing negative inventory. Allowing negative inventory can result in adverse calculations for item costing, especially when iVend is integrated with an ERP. |
Use Quick Complete (Using Cash Payment Type) | If this function is enabled, then the [F11 Quick Complete Cash] button on POS will be available for the cashier to use. When the user clicks on this button at the POS, the system assumes that the customer would like to complete the transaction with a payment using Cash only and that the full exact amount is being tendered. This feature is useful in situations where the transaction volume is very high at the POS for the store. The system default and most commonly used setting is for this function to be turned on. |
Confirmation Required for Quick Complete | The [F11 Quick Complete Cash] button is used for completing a transaction at the POS, assuming that the customer will pay the full amount owing by cash and that the exact amount will be tendered. Therefore, this feature enhances the sales process significantly by speeding up the completion of transactions at the POS, which is particularly beneficial in stores with high volume sales. If this flag is checked then system will prompt the cashier with a message to confirm that the sale is to be completed using the Quick Complete method with cash and that the exact amount will be tendered. The system default and most commonly used setting is that this feature is turned on. |
Complete Tendering on Zero Balance | When this flag is checked then it is assumed that when the payment balance owing becomes zero at the POS, then the cashier has tendered the transaction completely and the transaction would be automatically saved. The system default and most commonly used setting is that this feature is turned on. |
Restrict Search of other POS Transactions | When this flag is checked, then the cashier at the POS would only be able to search for transactions that were processed at that particular POS, i.e. The transaction search results would be limited to the transactions performed on the same POS. The system default is that this option is set to false (unchecked) so that the cashier can search freely for all the transactions that are carried out in a store from any POS. |
Use Last Selected Event for Next Transaction | When this flag is checked then the selected Event (Transaction Mode) at the POS would default automatically to all subsequent and consecutive transactions at the POS thereafter, e.g. If the cashier selected the transaction mode of Special Order, then the system would default the next transaction to Special Order once the current transaction had been completed. The system default and most commonly used setting is that this feature is turned off. |
Open Product Search if Barcode is not Recognized | When this option is selected, the system will return a message to the cashier if the product’s barcode scanned at the POS is not recognized by the system. Check this flag if you wish that there is need to open the product search screen when the barcode of the product is not recognized by the system. This feature is not enabled by default, but it is recommended to give consideration to turning it on as it would aid the cashier to search for the product by other means. |
Allow Combining Multiple Transaction Refund in Single Transaction | Check this flag if you wish to allow the cashier to be able to combine refunds for different transactions within the same single transaction at POS. The system default and most commonly used setting is that this feature is turned on. |
By Default, Use Current Business Date in Transaction Search | You check this flag if you wish that the current business date is set in the “Date From” and “Date To” fields on the Transaction Search screen at the POS. If this flag is not checked then the dates are not defined in the “Date From” and “Date To” fields on the Transaction Search screen and the cashier would then need to define the date range manually for which they want to search the transactions on. The system default and most commonly used setting is that this feature is turned on. |
Application Theme | Select the display theme for the iVend POS and Management Console applications. The system default is set to Metropolis and is the most commonly used theme. |
Allow login if Business Date is not same as Current Date | When this option is checked, then the system will allow the user to log into the POS regardless of the system date not being the same as the business date. The user will receive a warning message and will be given the option to confirm that they wish to proceed to log into the POS even though the business date is not the same as the system date. When this flag is unchecked, then the system will not allow the user to log into the POS when the system date is not equal to the business date. The system default is that this feature is turned on. |
Allow Sales without Serial/Batch Selection | When this option is checked then the system will allow the cashier to sell a product at the POS that is Serial number or Batch managed without the need to select the serial number or the batch of the product. The system default and most commonly used setting is that this feature is turned off. |
Allow Recalling Multiple Suspended Transactions | When this option is checked then the system will allow the cashier to recall multiple suspended transactions and then combine them all into a single sale transaction at the POS. The system default and most commonly used setting is that this feature is turned off. Consideration should be given to controls on this setting for Loss Prevention management. |
Log Voided Transactions | When this option is checked, then the system will start to log the occurrences of transactions being voided at the POS. The results as tracked and can be viewed in the Loss Prevention report and dashboard. The system default is that this feature is turned off and that is because of the potential performance load on the system to audit transaction voids that occur. The recommendation is to turn this on only if potential loss to fraudulent transactions is being suspected. There are other mechanisms in the system to control the voiding of transactions such as the Manager Override feature, which if enabled, would reduce the reliance on the void log reporting. |
Maximum number of lines in Transaction | Enter the maximum number of transaction items that a transaction can support. This is generally used in cases where the pre-printed stationary is used while printing the receipt. The system default is set to 99999. |
Enable Printing for Transaction Preview | When this option is checked, then the system will allow the user to perform a print during the preview of the transaction receipt before the transaction is completed at the POS. The system default is that this setting is turned off. Consideration should be given to Loss Prevention before enabling this feature. |
Product Image in Search | Enable this feature if you wish that the product image is displayed in search results on the Product Search screen. The system default is that this feature is turned off. Consideration should be given to the performance load on the system if large numbers of products are maintained. Searching on products with this feature turned on will be slower than when it is not enabled. It is recommended to keep the image file size to a minimum as this will aid in performance if the feature is turned on. |
Product Image Height in Search | Set the image height of the images attached to the products that will be displayed in search results. This feature is only relevant if the option, Product Image in Search is enabled. The default system setting is zero, which allows the system to dynamically resize the image to best fit the screen in the search results. The value here should only need adjusting if a performance issue is detected. The recommendation is to ensure that image files attached to the products are maintained to a minimum size. |
Allow Tax Free | When this option is checked, the system will allow that a product can be sold free of tax, overriding any standard tax settings and calculations at the POS. The system default setting is that this feature is turned off. |
POS Layout | Sets the POS Design Layout that the Retail Profile will be attached to – Click on the radio […] button to search on and select from a list of available POS Design Layouts. When the Retail Profile is set at the User level, POS level, Store level or at the Enterprise level, then the POS Design Layout assigned here could be used by and individual User, by all Users that access a particular POS, by all Users that operate at a Store or by all Users that access the system across the entire store network. The Retail Profile governs what POS design will be used and at what level, depending on how it is assigned. |
Import File Delimiter | Set the field value delimiter to be used in text-based import files for inventory transactions in the system. This is useful if the decimal places separator on numeric values uses a comma. The system default is set as the comma (,) delimiter. |
Show Available Items only for Promotions/ Upsells | When this feature is checked, then the system will only display promotions and upsells for those products included that have available inventory, i.e. if a product included in the Get Products side of a Bonus Buy Setup or an Upsell product does not have any available inventory then it will not be displayed to the cashier at the POS as an option to offer the customer in a sale. This feature takes into account the settings defined at the Enterprise to Allow Negative Inventory. The system default setting for this feature is that it is turned off. |
Check for Cash Drawer Status | When this option is enabled, the system will check if the Cash Drawer is closed before commencing a new transaction. The system default setting is that this feature is turned off. |
Check for Printer Status | When this option is enabled, the system will check if the Receipt Printer is online before commencing a new transaction. The system default setting is that this feature is turned off. |
Number of Records to Display on Default Search | The system default setting is defined as 1000 records. This feature assists in performance loads on the system when large numbers of records are maintained. |
Barcode Scanning on POS | |
Allow Product Scanning | Check this flag if the user is allowed to scan products at the POS. The system default and most commonly used setting is that this feature is turned on. |
Allow Customer Scanning | Check this flag if the user is allowed to change the customer at the POS by either scanning or entering the customer information in the scan area on the main transaction screen. The system default and most commonly used setting is that this feature is turned on. |
Allow Transaction Scanning | Check this flag if the user is allowed to retrieve historical information by either scanning or entering the Transaction ID in the scan area on the main transaction screen. The system default and most commonly used setting is that this feature is turned on. |
Allow Sales Person Scanning | Check this flag if the user is allowed to associate a Sales Person to all the items within a transaction by either scanning or entering in the Sales Person’s ID in the scan area on the main transaction screen The system default and most commonly used setting is that this feature is turned on. |
Allow Coupon Scanning | Check this flag if the user is allowed to apply the value of a coupon by either entering or scanning the Coupon ID in the scan area on the main transaction screen. The system default and most commonly used setting is that this feature is turned on. |
Allow Barcode Scanning of Loyalty Card | Check this flag if the user is allowed to assign a Loyalty Card to a transaction by entering or scanning the Loyalty Card ID in the scan area on the main transaction screen. If the Loyalty Cards contain a barcode that can be read by a barcode reader then it is recommended to check this flag. The system default is that this setting is turned off as not all implementations will include iVend Loyalty. |
Transaction Screen Settings | |
Quick Button Panel | Specify the Quick Button Panel template to be used to show in the Button Panels at the POS. Click on the radio […] button to search on and select a Quick Button Panel from the available list. |
Matrix Product Information Panel | Specify the Matrix Product Information Panel template to be used to show the product information on the Matrix Products View screen at the POS. Click on the radio […] button to search on and select a Matrix Product Information Panel from the available list |
Manager Override Required | |
Cost Protection Override | Select this option to allow a manager override that will bypass the Cost Protection settings on a product sold at the POS. The system default setting is that this feature is turned off. |
Credit Limit Override | Set the appropriate option if a manager override is required at the POS when a customer is making an On-account payment and the total outstanding amount owed by the customer exceeds their assigned credit limit. Select an option from the drop-down. The available settings are: · Allow · Allow with Manager Override · Don’t Allow The system default setting is that this option is set to Allow. |
Reprint Transaction Receipts | Select this option if a manager override is required at the POS when the cashier wants to reprint a transaction receipt at the POS. The system default setting is that this feature is turned off. |
Change Sales Person in Special Order Edit | Select this option if a manager override is required at the POS for changing the sales person during the editing of a special order. The system default setting is that this feature is turned off. |
Change Sales Person in Refunds | Select this option if a manager override is required at the POS for changing the sales person during processing a sale refund of an item. The system default setting is that this feature is turned off. |
Deleting Suspended Transactions | Select this option if a manager override is required at the POS for deleting any suspended transactions. The system default setting is that this feature is turned off. |
Void Sale | Select this option if a manager override is required at the POS for voiding sales transactions. Consider using this feature instead of the option to log voided sales. The system default setting is that this feature is turned off. |
Void Item | Select this option if a manager override is required at the POS for voiding items from a transaction. This is opposed to voiding an entire transaction. Consideration should be given to enabling this feature if a manager override is required on Voiding Sales as the cashier could use the Void Item feature to void all items in the sale. The system default setting is that this feature is turned off. |
Transaction Mode Change | Select this option if a manager override is required at the POS when the cashier tries to change the transaction mode at the POS, e.g. The current transaction mode is Sale and the cashier tries to change the transaction mode to Special Order – with this feature turned on then they would require a manager override to proceed. The system default setting is that this feature is turned off. |
Customer Search | Select this option if a manager override is required at the POS when the cashier tries to search for a customer by clicking on the [F2 Customer Search] button at the POS. The system default and most commonly used setting is that this feature is turned off. |
Product Search | Select this option if a manager override is required at the POS when the cashier tries to search for a product by clicking on the [F3 Product Search] button at the POS. The system default and most commonly used setting is that this feature is turned |
Sale Information Edit | Select this option if a manager override is required at the POS when the cashier tries to edit the sale options and settings by clicking on the [F4 Sale Edit] button at the POS. The system default and most commonly used setting is that this feature is turned off. |
Item Information Edit | Select this option if a manager override is required at the POS when the cashier tries to edit the transaction item options and settings by clicking on the [F5 Item Edit] button at the POS. The system default and most commonly used setting is that this feature is turned off. |
Transaction Search | Select this option if a manager override is required at the POS when the cashier tries to search for previous transactions by clicking on the [F6 Transaction Search] button at the POS. The system default and most commonly used setting is that this feature is turned off. |
Fulfillment | Select this option if a manager override is required at the POS when the cashier tries to change the fulfillment details by clicking on the [F7 Fulfillment] button at the POS. The system default and most commonly used setting is that this feature is turned off. |
Return Product After Return Date Expired | Select this option if a manager override is required at the POS when the cashier tries to refund an item for which the number of Return Days set on the product have already elapsed. The system default and most commonly used setting is that this feature is turned off. |
Suspend/Recall | Select this option if a manager override is required at the POS when the cashier tries to suspend or recall a suspended transaction by clicking on the [F10 Suspend/Recall] button at the POS. The system default setting is that this feature is turned off. Consideration should be given to Loss Prevention with this feature. Suspended transactions are tracked and recorded in the Loss Prevention report and dashboard. |
Product Surcharge Waiver While Return | Select this option if a manager override is required at the POS when the cashier tries to delete the return surcharges applied on the item during a refund. The system default setting is that this feature is turned off. |
Payment Cancellation | Select this option if a manager override is required at the POS when the cashier tries to delete a payment on the Payments screen. The system default and most commonly used setting is that this feature is turned off. |
Cash Out | Select this option if a manager override is required at the POS when the cashier tries to perform a Cash Out by clicking on the [Cash Out] button under Store Operations from the User Menu at the POS. The system default and most commonly used setting is that this feature is turned off. |
Cash In | Select this option if a manager override is required at the POS when the cashier tries to perform a Cash In by clicking on the [Cash In] button under Store Operations from the User Menu at the POS. The system default and most commonly used setting is that this feature is turned off. |
Transaction Refund | Select this option if a manager override is required at the POS when the cashier tries to perform a Transaction Refund at the POS. The system default and most commonly used setting is that this feature is turned off. |
Pole Display Message Details | |
Complete Sale Message | If selected, then this message is displayed at the completion of the sales transaction. Select a message from the list of pole display messages. Click on the radio [...] button to open the Pole Display Message Search screen and select the message. To add a new message, press F3 or click on the [F3 New] button in the Pole Display Message Search screen. This feature would only be applicable if the POS has a Pole Display connected. |
Idle Message | If selected, then this message is displayed when no transactions are being processed at the POS and the terminal is idle. Select a message from the list of pole display messages. Click on the radio [...] button to open the Pole Display Message Search screen and select the message. To add a new message, press F3 or click on the [F3 New] button in the Pole Display Message Search screen. This feature would only be applicable if the POS has a Pole Display connected. |
Start Transaction Message | If selected, then this message is displayed when the sales transaction begins. Select a message from the list of pole display messages. Click on the radio [...] button to open the Pole Display Message Search screen and select the message. To add a new message, press F3 or click on the [F3 New] button in the Pole Display Message Search screen. This feature would only be applicable if the POS has a Pole Display connected. |
Discount Details | |
Max Sale Discount Percent Allowed | Enter the maximum discount percent that the user at the POS can give on a transaction. The system default value is 0.00% which means that there is no limitation set on the maximum discount percentage that can be applied by the user on a sale transaction at the POS. |
Max Sale Discount Amount Allowed | Enter the maximum discount amount that the user at the POS can give on a transaction. The system default value is 0.00 which means that there is no limitation set on the maximum discount amount that can be applied by the user on a sale transaction at the POS. |
Max Line Discount Percent Allowed | Enter the maximum discount percent that the user at the POS can give on a line item in a transaction. The system default value is 0.00% which means that there is no limitation set on the maximum discount percentage that can be applied by the user on a sale transaction line item at the POS. |
Max Line Discount Amount Allowed | Enter the maximum discount amount that the user at the POS can give on a line item in a transaction. The system default value is 0.00 which means that there is no limitation set on the maximum discount amount that can be applied by the user on a sale transaction line item at the POS. |
Reason Code Details Required | |
Check Box | Select the checkbox next to the option in the list if you want to prompt the user to enter a Reason for performing any of the activities listed at the POS. · Cash In · Cash Out · Void Item · Void Sale · Open Cash Drawer · Price Override · Refund Item · Refund Sale · Line Item Tax Override · Sale Tax Override · Shutdown Terminal · Line Item Discount · Sale Discount · Expense · Deleting Suspended Transaction · Till Count Variance · Suspend Transaction |
Comment Details Required | |
Check Box | Select the checkbox next to the option in the list if you want to prompt the user to enter a Comment for performing any of the activities listed at the POS · Cash In · Cash Out · Void Item · Void Sale · Open Cash Drawer · Price Override · Refund Item · Refund Sale · Line Item Tax Override · Sale Tax Override · Shutdown Terminal · Line Item Discount · Sale Discount · Expense · Deleting Suspended Transaction · Till Count Variance · Suspend Transaction |
POS Wild Cards | |
For Quantity | Enter the char that can be used as a wild-card for changing the quantity of an item on the transaction. For example, the user would enter @2 in the Scan Area on the main transaction screen where the wild card for Quantity change is set to @ and they wish to change the quantity from 1 to 2 for the item selected in the transaction. |
For Price | Enter the char that can be used a wild-card for changing the price of an item on the transaction. For example, the user would enter #20.00 in the Scan Area on the main transaction screen where the wild card for Price change is set to # and they wish to change the price from 25.00 to 20.00 for the item selected in the transaction |
For Discount % | Enter the char that can be used a wild-card for changing the discount percent on an item on the transaction. For example, the user would enter %10 in the Scan Area on the main transaction screen where the wild card for Discount Percent change is set to % and they wish to change the discount percentage from 5% to 10% for the item selected in the transaction |
For Discount Amount | Enter the char that can be used a wild-card for changing the discount amount on an item on the transaction. For example, the user would enter &10.00 in the Scan Area on the main transaction screen where the wild card for Discount Amount change is set to & and they wish to change the discount amount from $5.00 to $10.00 for the item selected in the transaction |
Email Receipts | |
Email Receipt | Select this option if you wish that the user can send an e-Receipt for the transactions performed at POS. |
Email Address for Receipt | Enter the email ID which is to be used for sending out the e-Receipts to customers upon the completion of transactions at the POS. |
Email Template | Select the e-Receipt email template which is to be used while sending an email with the e-Receipt attached. |
Report | Select the report in the system which is to be used as the e-Receipt layout. This is the design layout for the e-Receipt. |
Receipt Sending Mode | Select the mode in which the system should operate, i.e. the mode by which the e-Receipts are sent to the customer from – the operation options are by either: · Store · Enterprise (System default) |
Customer Display Settings | |
Type | The Customer Facing Display has to be enabled in the Hardware Profile that is assigned to the POS before the Customer Display Settings defined in this section become relevant. Uncheck this flag if you wish to hide the Transaction Type information from showing in the Customer Facing Display at the POS. The system default setting is that this feature is turned on. |
Product Code | Uncheck this flag if you wish to hide the Product Code information from showing in the Customer Facing Display at the POS. The system default setting is that this feature is turned on. |
Description | Uncheck this flag if you wish to hide the Product Description information from showing in the Customer Facing Display at the POS. The system default setting is that this feature is turned on. |
Discount | Uncheck this flag if you wish to hide the Discount information from showing in the Customer Facing Display at the POS. The system default setting is that this feature is turned on. |
Quantity | Uncheck this flag if you wish to hide the Quantity information from showing in the Customer Facing Display at the POS. The system default setting is that this feature is turned on. |
UoM | Uncheck this flag if you wish to hide the Unit of Measure (UoM) information from showing in the Customer Facing Display at the POS. The system default setting is that this feature is turned on. |
Price | Uncheck this flag if you wish to hide the Price information from showing in the Customer Facing Display at the POS The system default setting is that this feature is turned on. |
Total | Uncheck this flag if you wish to hide the Line Total information from showing in the Customer Facing Display at the POS. The system default setting is that this feature is turned on. |
Row Height | Specify the row height of the information line to be displayed on the Customer Facing Display at the POS. The system default row height is set at 30. |
Font Size | Specify the font size to be used for the information line to be displayed on the Customer Facing Display at the POS. The system default font size is set at 8. |
Show Payment Information | Uncheck this flag if you wish to hide the Payment Information from showing in the Customer Facing Display at the POS. The system default setting is that this feature is turned on. |
Loyalty Customer Search Grid Color Setting | Set the Color palette to be used to display the Loyalty Customer Search Grid in the Customer Facing Display at the POS – the system default Color palette setting is White with [0,15,66,63] – Click on the drop-down and a Color palette will be displayed for easy selection of an alternative Color scheme. |
Display Receipt Information to Customer | Uncheck this flag if you wish to hide the Receipt Information from showing in the Customer Facing Display at the POS. The system default setting is that this feature is turned off. |
Display Product Image to Customer | Uncheck this flag if you wish to hide the Product Image from showing in the Customer Facing Display at the POS. The system default setting is that this feature is turned off. |
Product Display Settings | |
Product Matrix Item Search Grid Color Setting | Set the Color palette to be used to display the Product Matrix Item Search Grid at the POS – the system default Color palette setting is White with [0,15,66,63] – Click on the drop-down and a Color palette will be displayed for easy selection of an alternative Color scheme. |
Product Matrix Child Item Search Grid Color Setting | Set the Color palette to be used to display the Product Matrix Child Item Search Grid at the POS – the system default Color palette setting is White with [0,15,66,63] – Click on the drop-down and a Color palette will be displayed for easy selection of an alternative Color scheme. |
Default Matrix View Type | Set the default Matrix View type to be used at the POS when selecting a Matrix product – options are: · Product Information (System default) – Fields displayed include: · Product Id · Product Description · Product Group · UPC code · Quantity Available · Tax Code · Product Image · User Fields · Price · Inventory Information – Fields displayed include: · Warehouses · Available quantity in each warehouse Both views are still available on the Product Attribute Selection screen at the POS however, the setting here determines which view is displayed first as the default in the display results when a Matrix Child product is chosen. |
Transaction Signature Capture | |
Check Box | Check this flag, if you wish that the user should capture the customer’s signature for any of the following transaction modes at the POS: · Sale · Sale Refund · Special Order · Layaway · Delivery · Quotation · Gift Certificate |
Buttons | |
[OK] | Pressing this button will update the Retail Profile in the system database with any changes made and then closes the screen. |
[Cancel] | Pressing this button does not save and will not commit any changes and closes the screen. |
Note: If the Retail Profile is edited, the changes made will only come into effect at the POS after the application at that POS has been restarted.
This concludes the document on – Retail Profile.
Related Articles
Any changes in retail profile is not replicating on POS
Problem Statement: Any changes in retail profile are not replicating on POS.( we are trying to change the setting in retail profile for POS but changes are not replicating to POS ). Proposed Solution: 1. Go to employee settings in the management ...Allow Special Pricelist Date Range Overlapping on Retail Profile
Problem statement : At the time of defined date range message appeared on special price list "To Date is conflicting with the other date range defined for the product” iVend version : 6.6.9369 Symptoms: NA Cause: NA Resolution / work around : There ...Missing Document Print Profile option
Problem Reported Document Print Profile was reportedly Missing at Management Console (below path). Open Management Console --> Administration --> -Retail configuration --> Document Print Profile Cause: Reported option was being looked out at ...Number of Records to Display on Default Search Parameter on Retail Profile
Product version: 6.5 Update 6 Problem statement - At the time of Search product when clicking the search button in the product search window its showing only top 1000 records especially during exporting a complete list of products. Proposed solution: ...Display profile : Hide and Enable the field in iVend
Display Profile Display profile is used to save customization of a screen for a user or group of users under any role. Every security role will have a display profile attached to it. When a user with particular role logs in the management console, ...