iVend Retail - Quick data entry form to enter Product Master data
iVend Retail - Quick data entry form to enter Product Master data (Product List)
In earlier version of iVend there were only two (2) ways by which Products could be entered in to the iVend system and these were:
1. Import / Export
2. Product Master entry form
Through the Import/Export option, you could enter multiple Products into the system whereas with the Product master entry form, you could enter only one product at a time, therefore the new Product List screen strikes a balance and allows you to enter multiple Products into the system with the help of the new interface provided.
For ease of use and convenience, the new user interface called Product List, provides several tabs with the help of which either products can be entered or viewed or related features can be viewed such as Inventory, Upsells and Alternate products for the respective product.
Note: This feature is available for use by iVend Retail users running versions 6.5 and onwards.
The Product List Entry Screen
This screen can be accessed from the iVend Management Console by going to: Operations > Inventory > Product List
This screen has been divided into three (3) sections:
1. Search Panel
2. Data Entry Panel
3. Button Panel
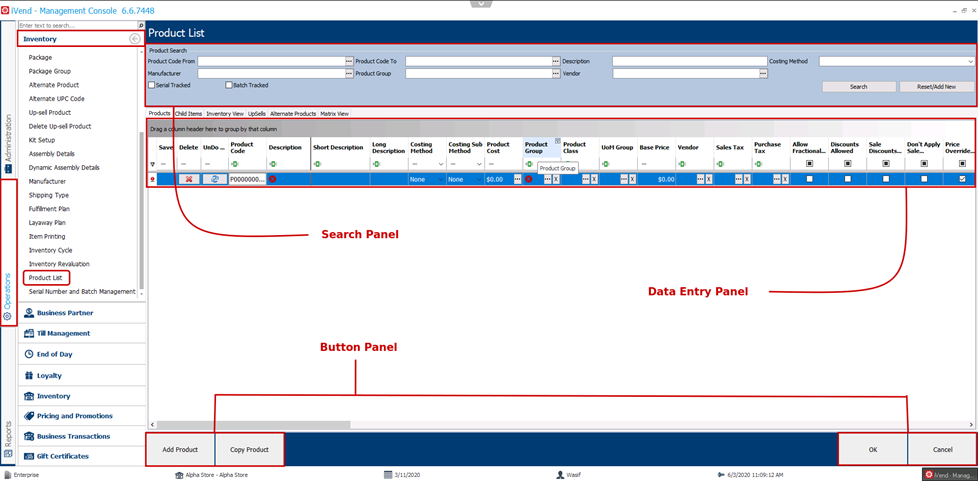
Figure 1 – Product Master
1. Search Panel
The Search Panel consists of several parameters (refer to the below table) which can be used to search the desired product/s to be viewed and/or updated. This can be used to narrow down the product list.

Figure 2 – Product List
1. Data Entry Panel
This panel consists of several tabs and the product details area. The details of each tab are described below.
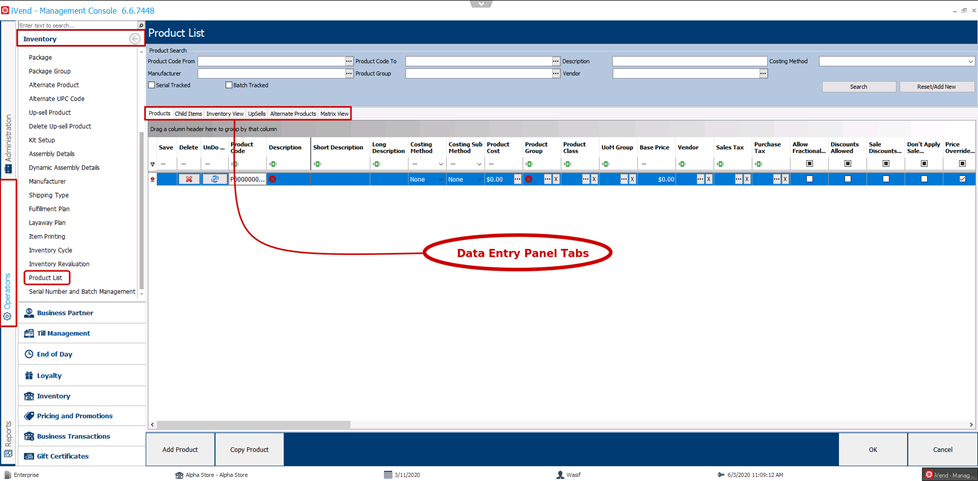
Figure 3 – Product List
Products Tab
Use the search panel to filter down the list of products otherwise, to see all products at one place click on the [Search] button without entering any parameters. Every row represents a product and contains its related information such as Product Group, Costing Method, Vendor, Manufacturer information, Product Attributes, etc. The user can add/edit multiple products in the details section of Data Entry Panel at one time.
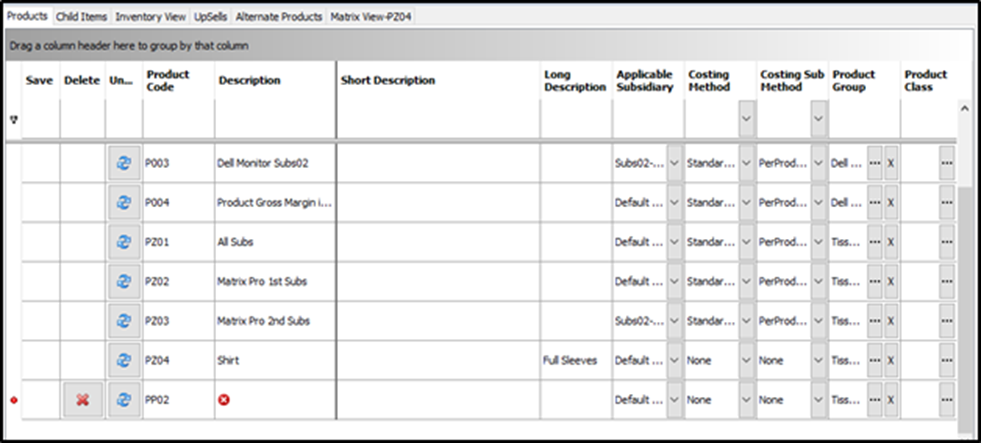
Figure 4 – Products Tab
Child Items Tab
To view Child items in this tab, first highlight a Parent product in the Products tab and then click on the Child Items tab to see all its related Child products.
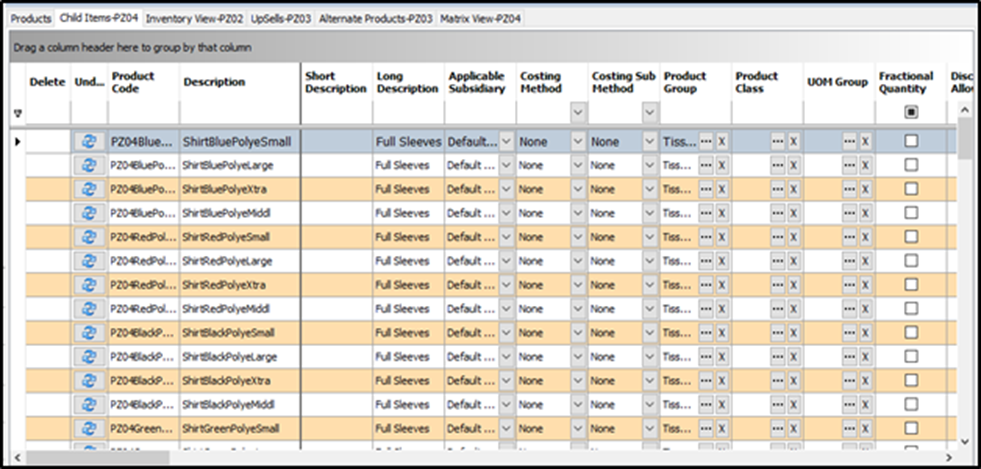
Figure 5 – Child Items Tab
Inventory View Tab
This tab is a View Only tab, highlight a product in the Products tab and then click on the Inventory View tab to see the inventory details. In the case of matrix items, the Inventory View tab will split into two parts, the first part shows the Child items and when any of the Child item is selected, then in the next section the inventory details of the respective Child product will be displayed. If Locations are enabled in the system, then it will display the inventory Location-wise.
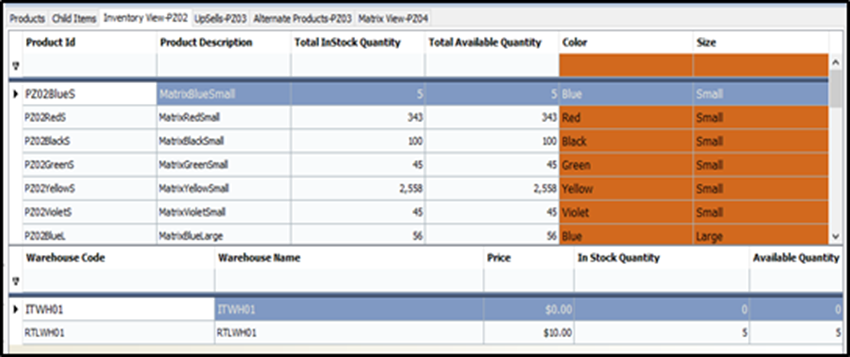
Figure 6 – Inventory View Tab
Upsells Tab
This tab is a View Only tab, to see the details in this tab, first select/highlight a product in the Products tab and then click on the Upsells tab. This tab will show all the Upsell products if any have been defined for the product.
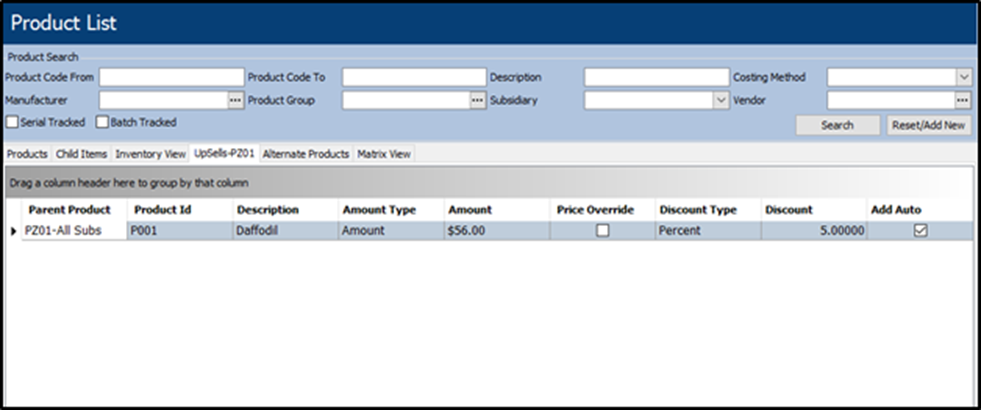
Figure 7 – Upsells Tab
Alternate Products Tab
This tab is a View Only tab, to see the details in this tab, first select/highlight a product in the Products tab and then click on the Alternate Products tab. This tab will show all the Alternate products if any have been defined for the product.
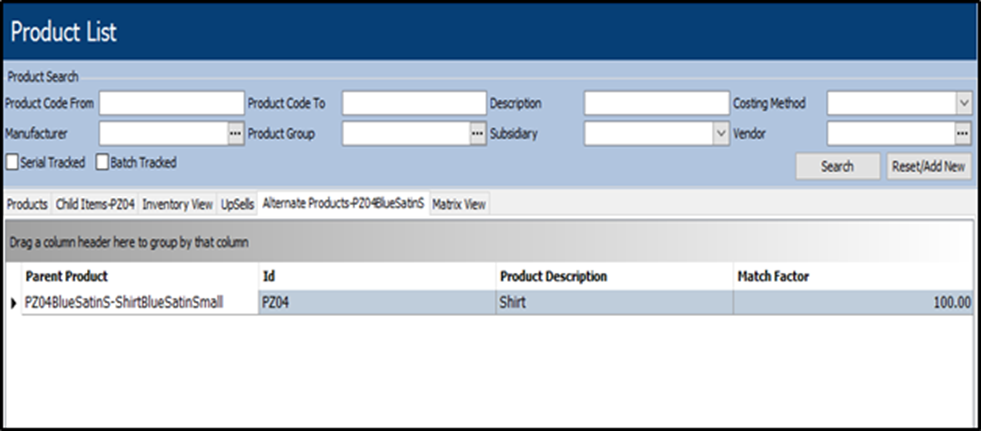
Figure 8 – Alternate Products Tab
Matrix View Tab
This tab is a View Only tab, this tab provides the matrix view for all the attributes of the selected product. Different options like Store, Display Options, Primary Attribute and Secondary Attribute are available to refine the search.
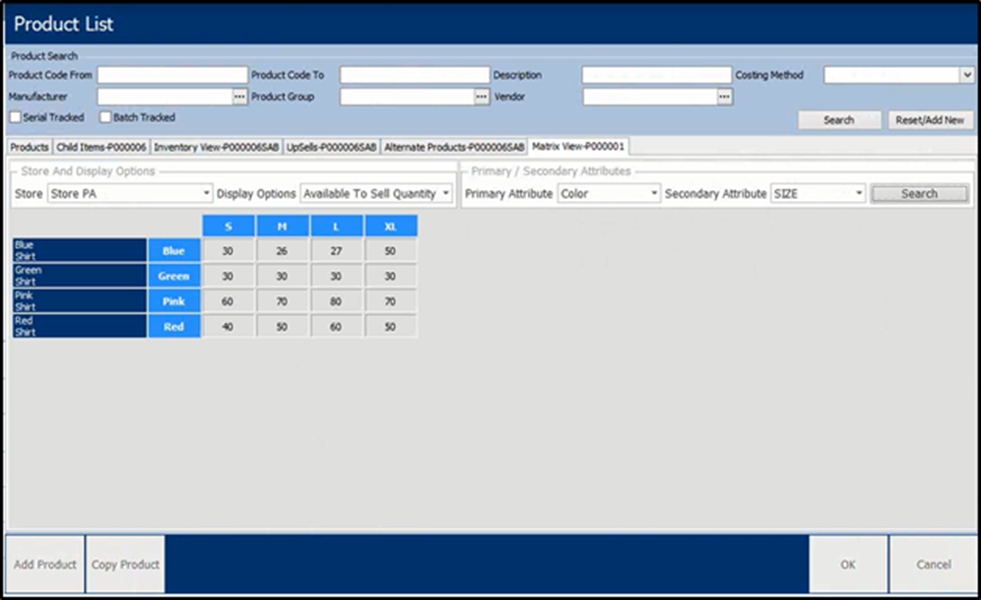
Figure 9 – Matrix View Tab
Product Detail Area
This area helps in editing / entering the data for the existing / new product/s to be created.
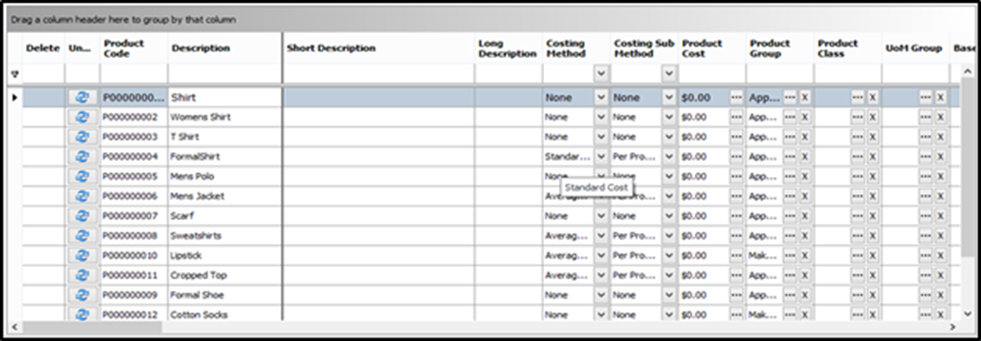
Figure 10 – Products Detail Area
Note: The grid contains all the validations that are needed to create a product, which are available in the standard product master creation screen. For example, the Product Group is mandatory.
1. Button Panel
The button panel consists of several buttons, made available to carry out certain activities, which are explained in detail in the following table.
Figure 11 – Button Panel
Steps to Create One or Multiple Product(s) using the Product List screen
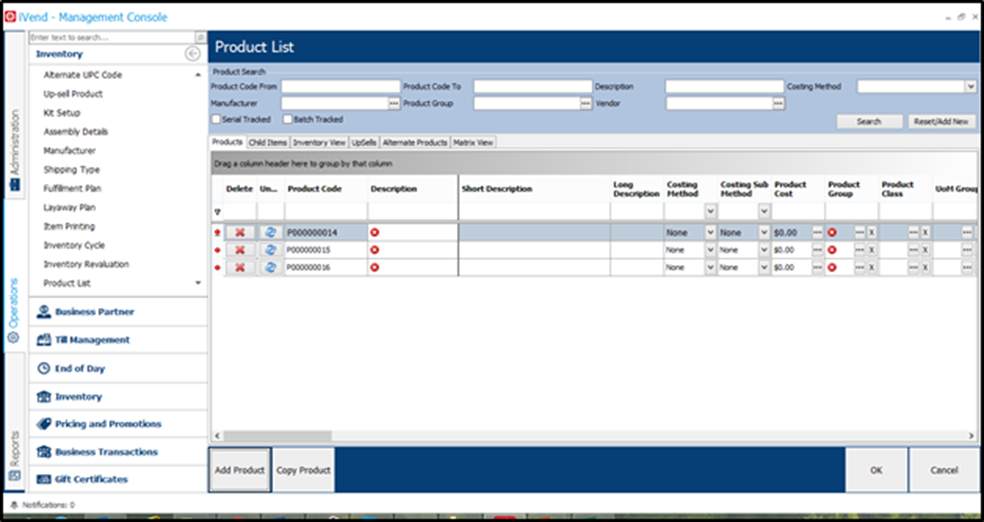
Figure 12 – Product List
Steps:
1. Log into the iVend Management Console and navigate to: Operations > Inventory > Product List – the Product List screen comes up.
2. Click on the [Add Product] button to add a line or if you want to enter multiple lines then click on this button as many times as needed.
3. Once the new line(s) are entered then enter the details that are mandatory or enter the details with which you want to create the items.
4. If required you may use the [Delete] button on the line to remove said line item if it is not required. Remember that once a record is saved, then it cannot be deleted.
5. Use the [Undo] button to remove any unsaved data. (This button is helpful in the event of an error being made during the editing an Item)
6. Click on the [Ok] button to save the details entered.
Note: Matrix products can also be created using this screen. Create a Matrix Parent Item in the Products tab, select the attributes with which the child items need to be created, now the child items with all the combinations of the attribute(s) selected can be viewed in the Child Items tab. It is possible to remove any child item if not required. Click on the [Ok] button to create the matrix items.
It is important to note, that if an attribute is not selected during creation of the Parent item, then it cannot be selected at a later point in time, which is as per the standard functionality.
Related Articles
General Settings in SAP Business One
Introduction The iVend Add-on helps in setting up some configurations required for integrating iVend with SAP Business One. The following sections of this document capture the functionality of the new screens created and new fields added to the SAP ...Remove Customer Master which has transaction and also remove those customer which has no transaction
Environment: Ivend 6.6 Problem statement: Need to Remove Customer Master which has transaction and also need to remove those customers which has no transaction details. Resolution/Work Around: 1. Remove customer master which has no transaction ...iVend Retail - Overview and Architecture
Overview and Architecture This article gives an overview of iVend Cloud. The article also discusses the different applications and modules of iVend Retail, brief description of these modules and finally overview of how the application suite is ...Download and Upload master data files in iVend Cloud
The information that is required to configure iVend cloud for an enterprise can be imported and exported into and from iVend Retail. The information should be arranged in a specific order so that it can be imported easily into iVend. The template for ...iVend Retail - Payment Processor Integration
Who should be reading this document? The target audience for this document is intended for partners who are willing to undertake source code modification under license from CitiXsys to pursue customisations. This document provides a complete overview ...