iVend Retail Audit Log
iVend Retail Audit Log
The Audit log is one of the most important features that comes with iVend versions 6.5 and above. It allows for the tracking of all users’ data changes in the application. All operations such as Add, Update, and Soft Deletes are logged in the system. In addition, users will be able to track the records and values that were modified and then compare the version of the record to see the information that was updated.
This feature is available across master data such as products, manufacturers, customers, prices, item costs, etc. and you can:
· Enable or disable the audit log for a particular object.
· View the log and compare changes.
· Purge the log.
Let us explain how the Audit Log works.
1. Log into the iVend Management Console and navigate to: IT Administration > Audit Log Master – the Audit Log Master screen comes up.
2. Under the column, Is Logging Enabled, check all the objects that you want to track, are selected (ticked). By default, the system comes with all enabled.
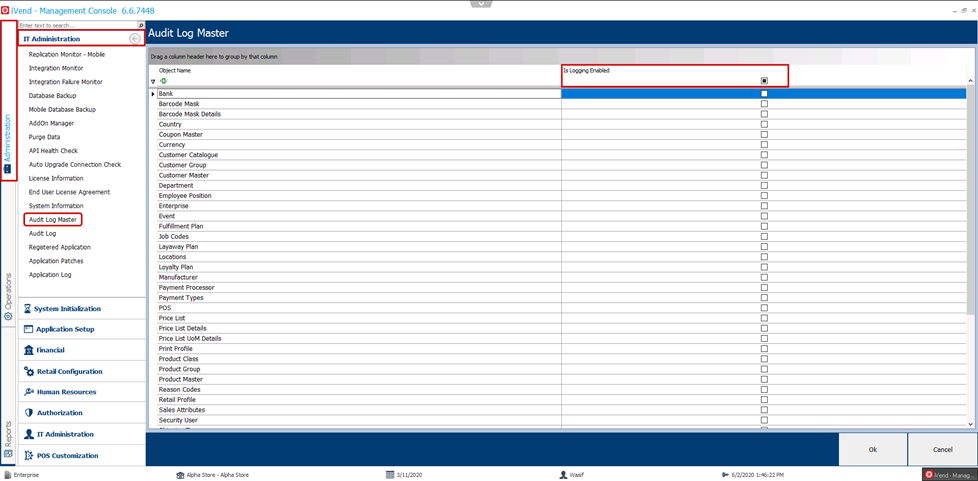
Figure 1 - Audit Log Master
Now that the Audit Log is enabled for all objects, let us go to check on how to view and compare record changes.
There are two (2) ways to view the change log for any object:
By going to the desired object screen. (Customer Master in our example)
Log into the iVend Management Console and navigate to: Operations > Business Partner > Customer – the Customer Search screen comes up.
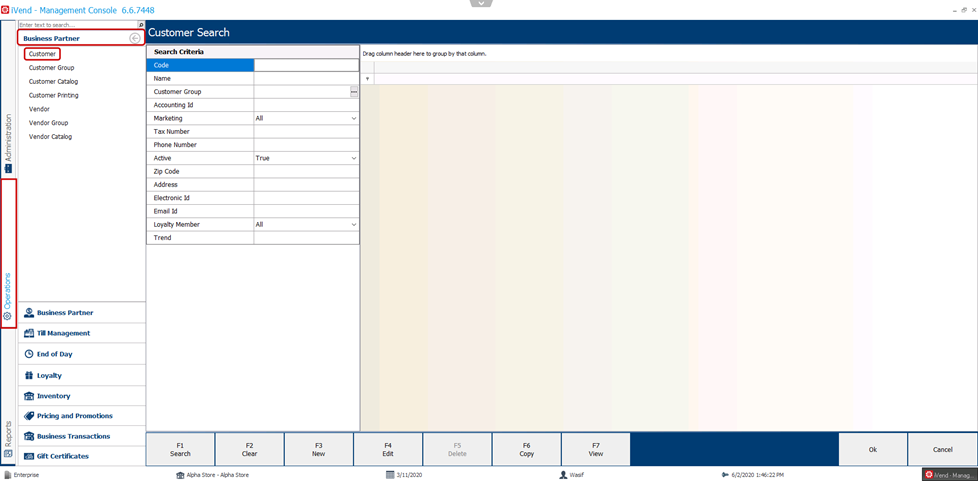
Figure 2 – Customer Search
Press [F1 Search] to pull up Customer Search screen. Select a Customer Name from the appeared search list. Press [F7 View] to pull up Customer Info screen.
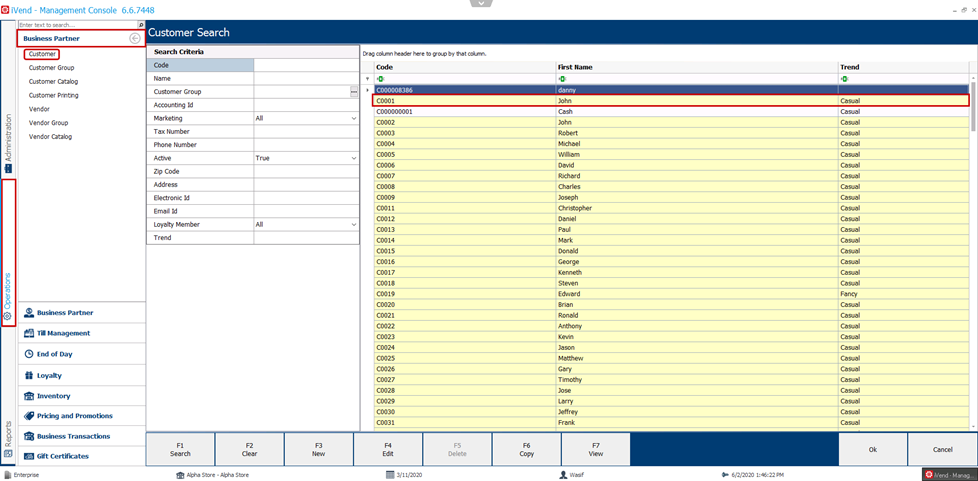
Figure 3 – Customer Search
Then right-click on the screen and select, View Log from the pop-up menu that appears.
Figure 4 – Customer Master
This will redirect you to the Audit Log screen for this particular object (i.e. Customer) as illustrated in the screen image below - please note:
a. The top row record in the display is the most recent.
b. The old value(s) that have been changed will be highlighted.
c. In this example, the customer discount has been changed from 0 to 15%.
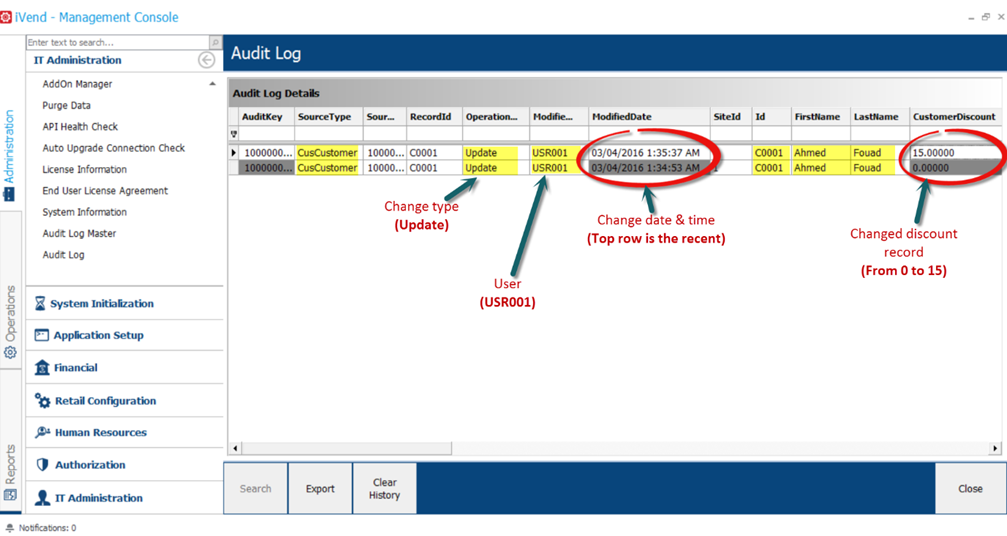
Figure 5 – Audit Log
2. By viewing and comparing the change log for any object
Log into the iVend Management Console and navigate to: Administration > IT Administration > Audit Log - the Audit Log screen comes up.
Then pick the source type that you want to look-up. In our example, we have selected the Customer Master. Then, click the [Search] button. In addition, you can filter your search results based on the Record Id.
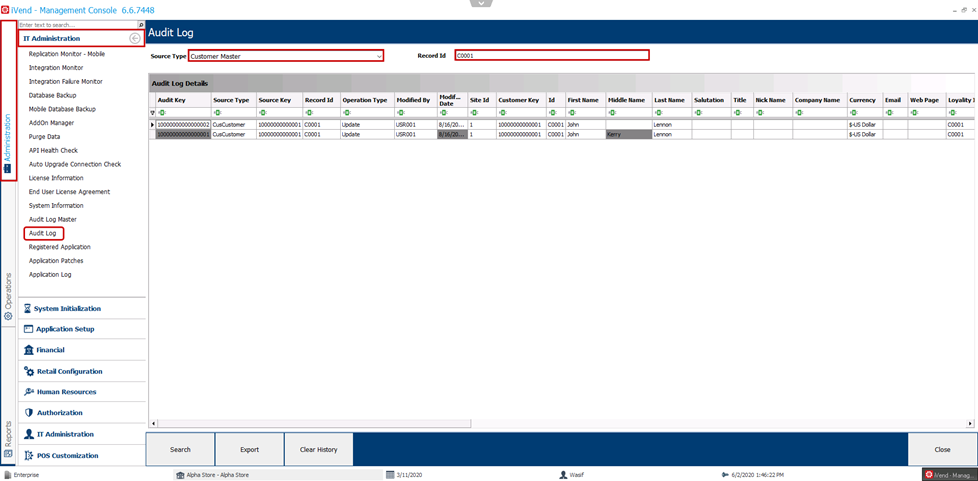
Figure 6 – Audit Log
The last option we are going to explain is how to purge the Audit Log.
In the Management Console, go to: Administration > IT Administration > Purge Data. Press the [F3 New] button.
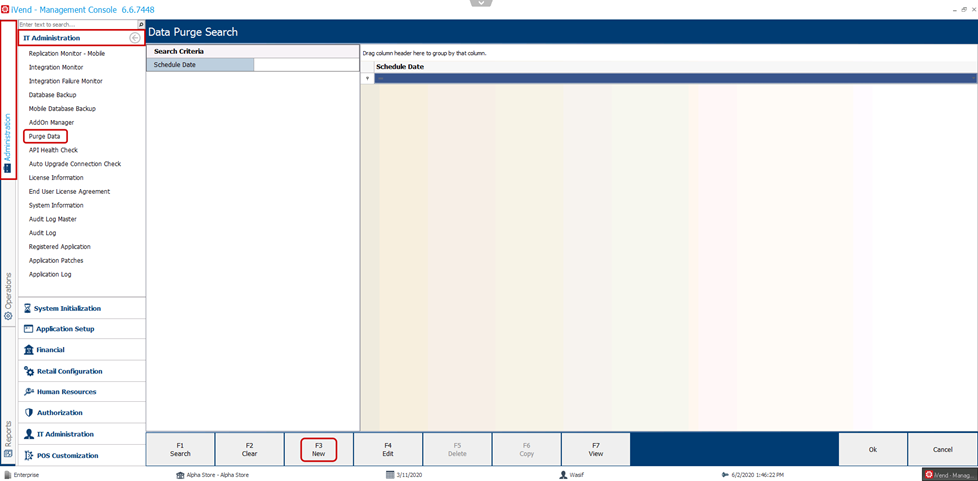
Figure 7 – Data Purge Search
This feature enables the Administrator to start the data purge activity at the stores. Using this, the System Administrator can generate an event for performing a data purge at the store.
This feature is generally used in the scenarios where the stores are using the SQL Server Express Edition. Due to size limitations of the SQL Server Express Edition database, the Administrator should keep the store database size in check and therefore this activity is recommended to be performed at regular intervals.
Note: This menu option is only available at the iVend Enterprise. Using this option would delete the transactional information from the store database.
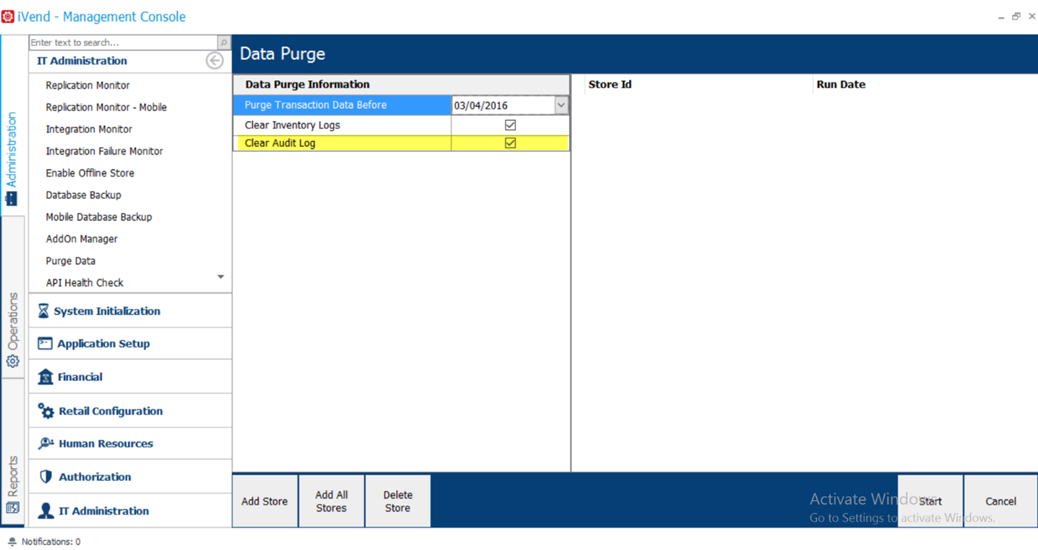
Figure 8 – Data Purge Screen
This concludes the article on the iVend Audit Log.
Related Articles
Is it feasible to check the audit log after clear history
Product version: iVend 6.6 Customer Query: Is it feasible to check the audit log after clear history. Support Comment: Here is no such provision available in current system iVend retail 6.6 that if we clear the history from audit log from MC then we ...Is it feasible to check the audit log after clear history
Product version: iVend 6.6 Customer Query: Is it feasible to check the audit log after clear history. Support Comment: Here is no such provision available in current system iVend retail 6.6 that if we clear the history from audit log from MC then we ...Retail Profile
Retail Profile The Retail Profile allows for the setting up of the system specifically for POS related information, which can then be applied to the POS at the store. It is important to note that a Retail Profile can be specified at the User, POS, ...Stock Takes in iVend Retail
Stock Take Stock-taking or Inventory Counting is the physical verification of the quantities and condition of items held in inventory within a location or warehouse. This may be done to provide an audit of existing stock. It is also a source for ...General Settings in SAP Business One
Introduction The iVend Add-on helps in setting up some configurations required for integrating iVend with SAP Business One. The following sections of this document capture the functionality of the new screens created and new fields added to the SAP ...